Episode #4 - Making your pages POP with pretty pictures

Welcome back, Low Coders! We’ve covered a lot of ground over the last few posts: creating objects, updating pages, and removing clicks from the process of adding and editing records. You are well and truly on the right side of the rebellion so far. Today, we are going to focus on adding some more oomph to your pages by adding images! Data is great and we all love it, but pictures just make life a bit better — imagine your workers trying to find the right part for their aircraft service and think how easy it would be to show them the part they’re after! Or if you’re in the business of helping people, an image of your patient or customer might just add a little je ne sais quoi. We will cover adding images to both your record pages and your list views in order to take your pages from data columns to Data Nirvana (pew pew).
Adding an image to a page is actually pretty simple. As long as you know where the picture is and how to tell Skedulo to put it on the page, the sky’s the limit. So, let’s dive in and make some magic.
List view images
If you followed along with the last episode, your list view should look something like this:
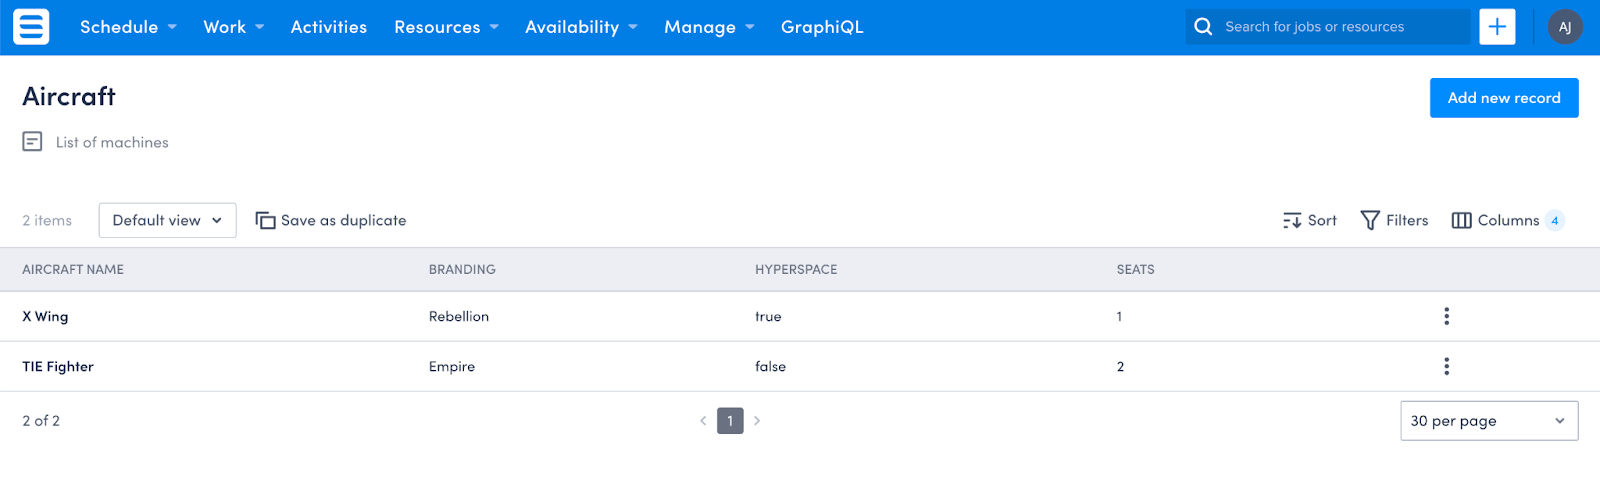
It’s fabulous, but it doesn’t really pop. Let’s add some images to make it amazing, shall we?
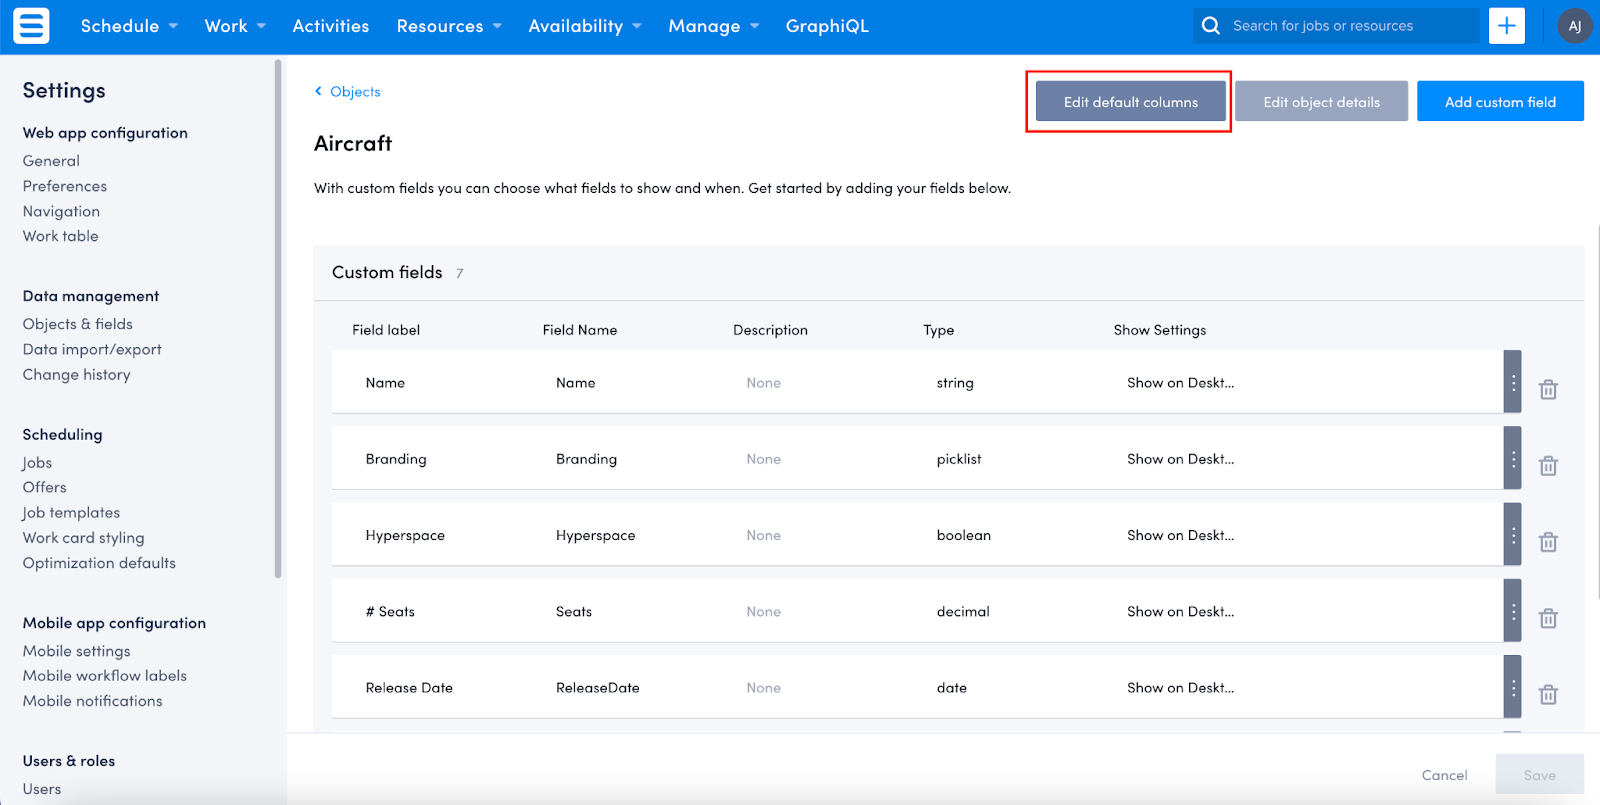
Let’s start with the Branding picklist. I’ve already found the images I want to use on the internet so now, I just need to update the Branding column template to show them off. First, I select my Aircraft object from the Objects & Fields menu, and then click on Edit default columns
From here, I go to edit the Branding column, and pop in the image references (as below):
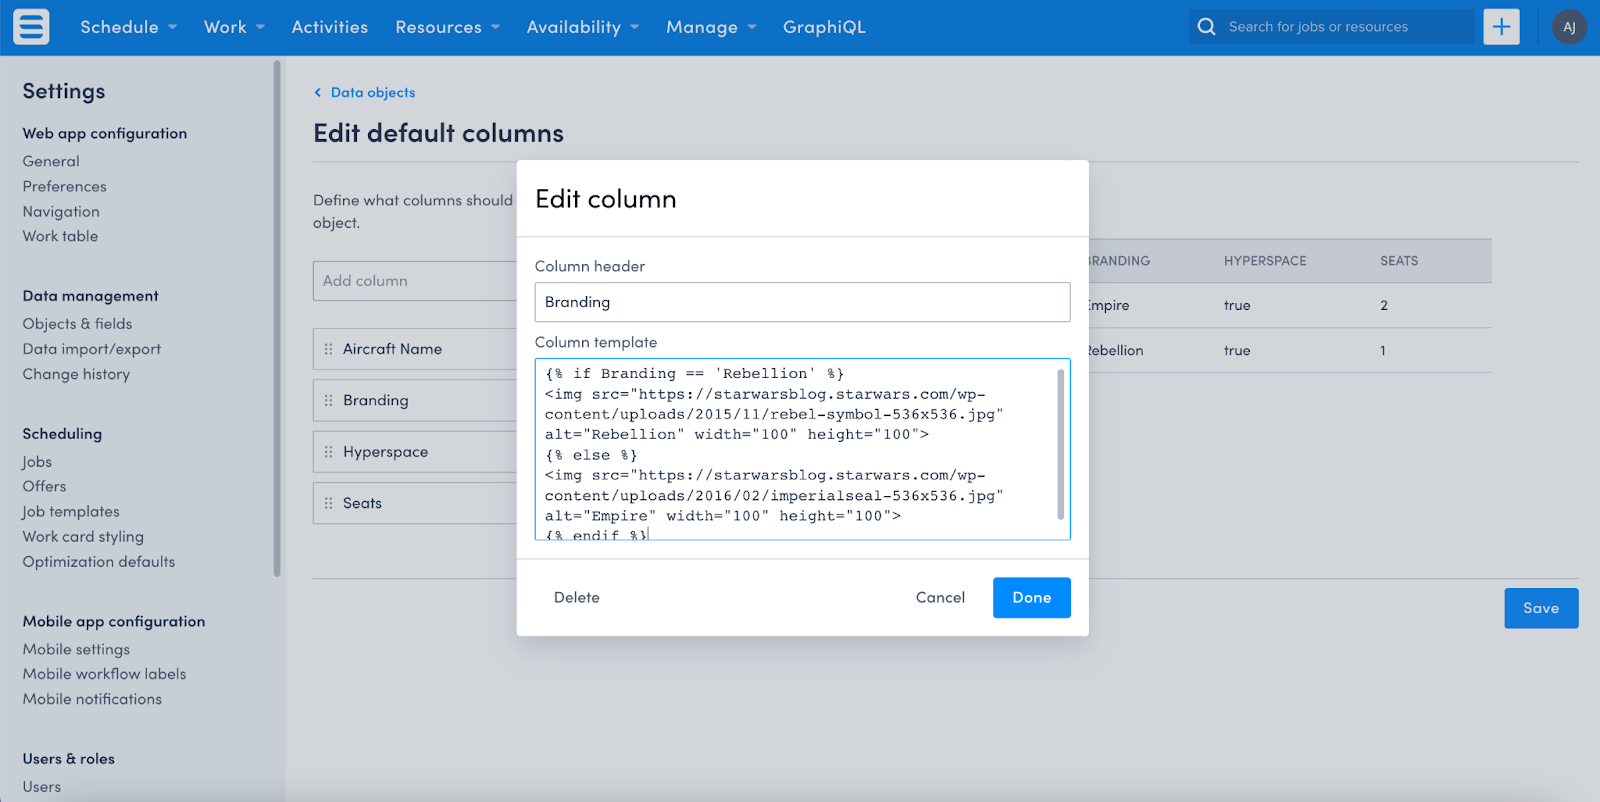
We are using an IF statement to tell Skedulo that if the Branding picklist value is Rebellion, then the rebel symbol image should be displayed, otherwise the imperial seal image should be displayed. Make sure you add in the alternative text, and set the height and width of the images.
    {% if Branding == ‘Rebellion’ %}
    <img src=”https://starwarsblog.starwars.com/wp-content/uploads/2015/11/rebel-symbol-536x536.jpg" alt=”Rebellion” width="60" height="60">
    {% else %}
    <img src=”https://starwarsblog.starwars.com/wp-content/uploads/2016/02/imperialseal-536x536.jpg" alt=”Empire” width=”60" height=”60">
    {% endif %}
Click on Done and you will see a preview of your list!
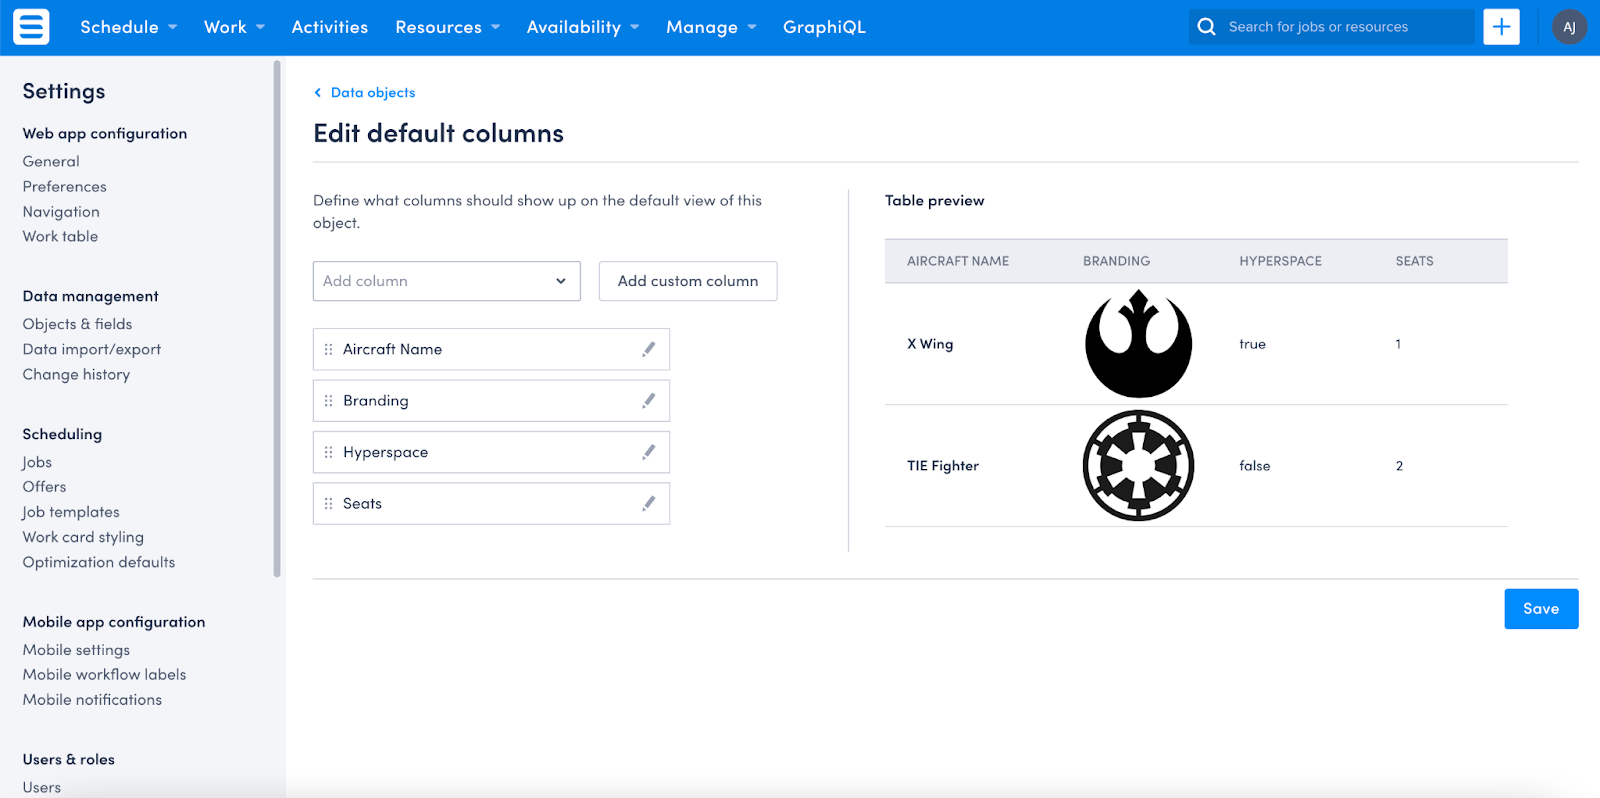
Brilliant!! If you’re happy with these changes, then click Save and jump ahead to the next step, but if, like me, you want to add a little more colour to your list view, then join me in editing the Hyperspace column.
I want to add some colour and change the true and false to something more eye-catching. Open the Hyperspace column editor and add the following code (which I found in this fabulous article):
    {% if Hyperspace %}
    <sp-lozenge leading-icon=”tick” theme=”solid” color=”green”>Yup</sp-lozenge>
    {% else %} <sp-lozenge leading-icon=”warning” theme =”border” color=”red”>Nope</sp-lozenge>
    {% endif %}
This then gives me a MUCH better preview of:
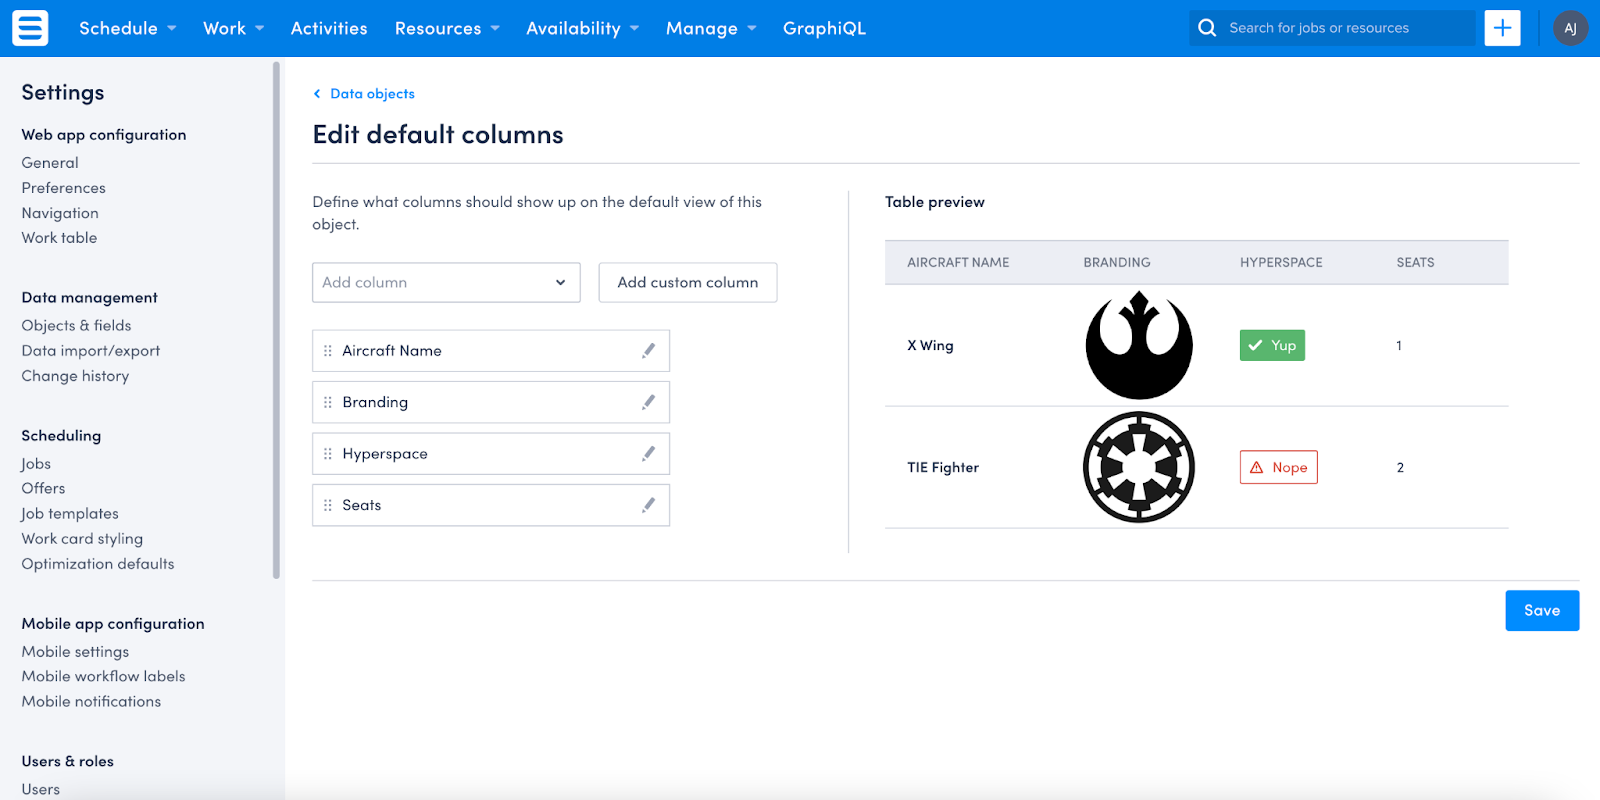
Brilliant! Remember to save your work and then off we go to bedazzle the view page!
Images for your pages
Remember when we added an Image custom field? If you just put your image URL in there then, when you are viewing your page, it only shows the URL, which isn’t what we’re really after. So, let’s change up the page to show the actual image, shall we?
To do this, we need to go and modify the View page of our Aircraft object, so off to Platform Pages (beta) in the Skedulo Settings menu we go. Find your aircraft-view page and let’s dive in!
Scroll down to where your Image field is within the Template Content section (if this is the first change to your page that you’re making, may I humbly suggest a review of this post?)
Following along with our favourite documentation, we know that we need to update the image field with the following code (making sure to update the field name to your actual field name):
    <sp-record-row>
    <span slot=”label”>Image</span>
    <platform-component package-name=”recordpage” name=”RecordTemplate” template=”{{ ‘<img src=”{{Image}}” alt=”{{name}}” width=”200" height=”200">’ }}”></platform-component>
    </sp-record-row>
When I go to look at my page now, I see:
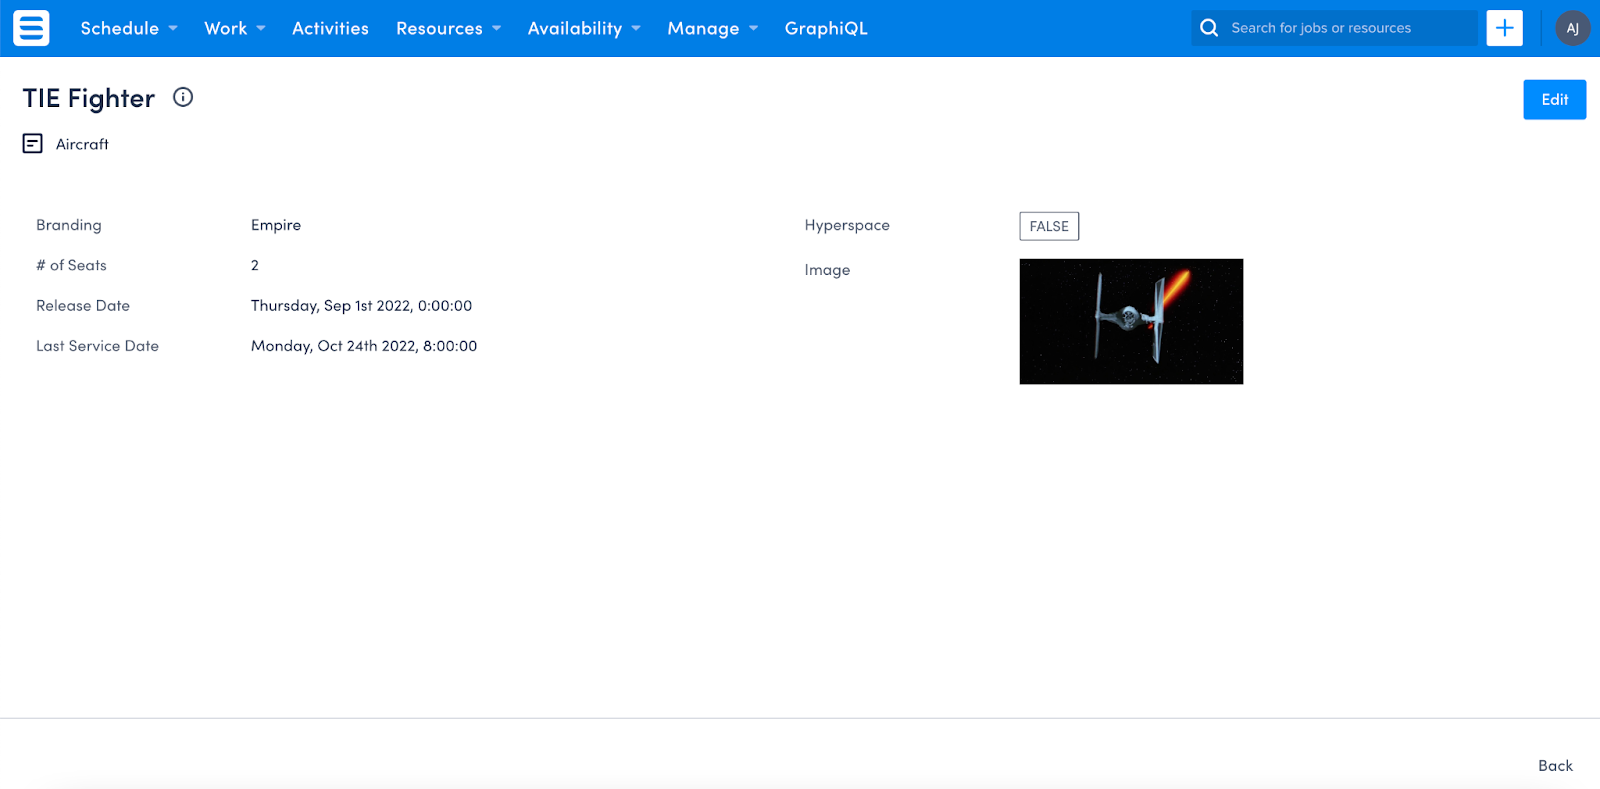
PRETTY!! Personally, I want to keep the Edit page as is, as this gives people the chance to change the URL if it’s wrong. If you want to change your Edit page to show the image as well, feel free, but remember that users will need a way to input or update the URL somehow. Perhaps a second field to input the image would help in this scenario.
I also want to add the Branding images we used in our list views, so let’s update that field as well, shall we?
Using the same code we added the image to the Branding column in the list view, we can update the Branding field on the View page, as per below:
<sp-record-row>
    <span slot=”label”>Branding</span>
        <platform-component
            package-name=”recordpage”
            name=”RecordTemplate”
            template=”{{‘{% if Branding ==“Rebellion”%}https://developerblog.skedulo.com/post/making-pages-pop-pretty-pictures/<img src=”https://starwarsblog.starwars.com/wp-content/uploads/2015/11/rebel-symbol-536x536.jpg" alt=”Rebellion” width=”100" height=”100">{% else %}<img src=”https://starwarsblog.starwars.com/wp-content/uploads/2016/02/imperialseal-536x536.jpg" alt=”Empire” width=”100" height=”100">{% endif %}’}}”>
        </platform-component>
</sp-record-row>
The only difference was that I needed to enclose the value of the picklist in double quotes, rather than the single quotes used in the list view update.
Once I’ve saved the changes, my page looks like this:
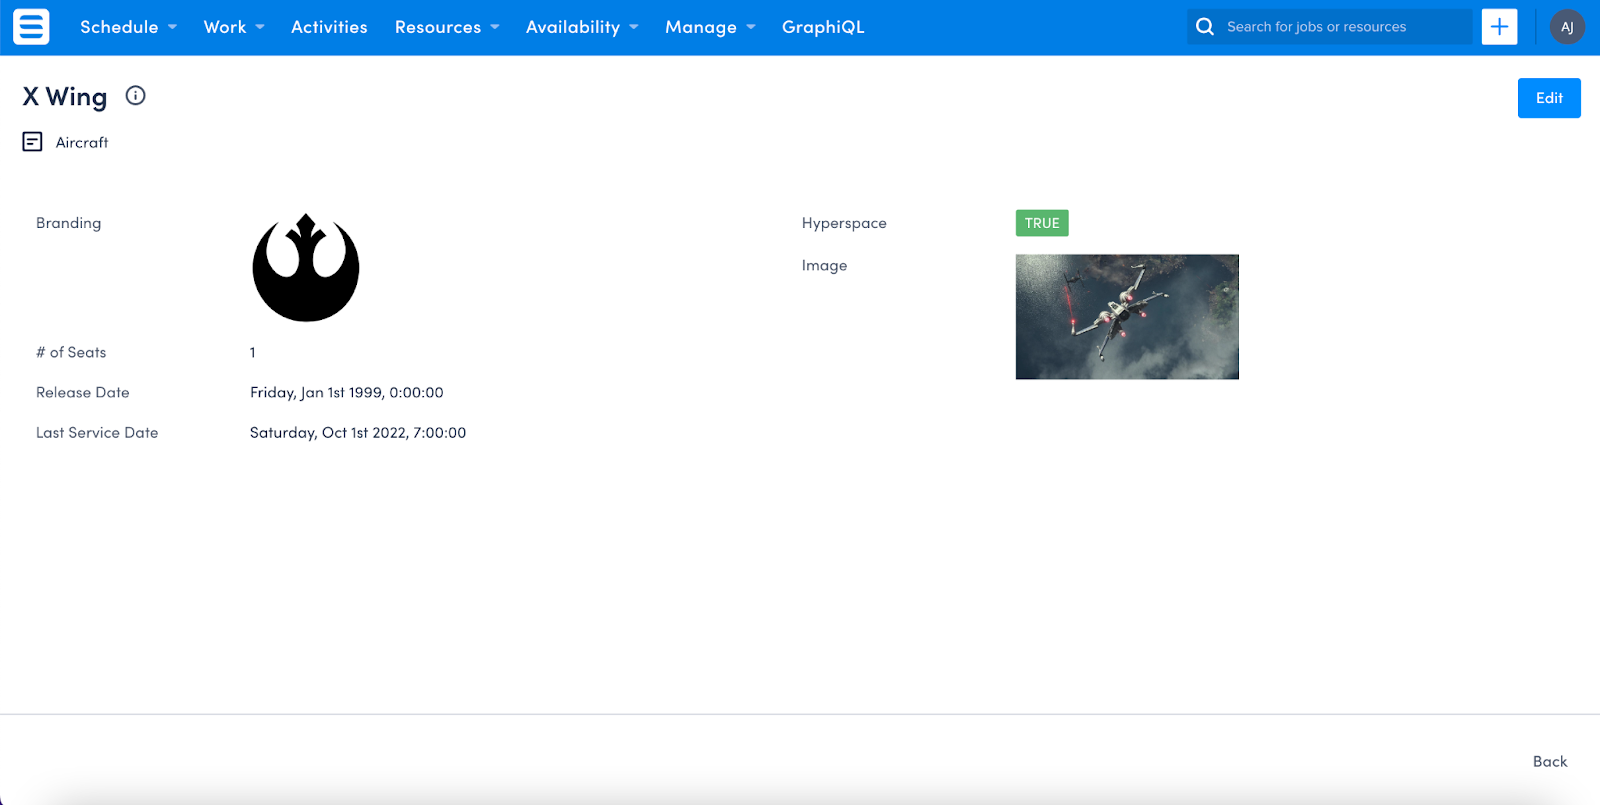
Personally, I would prefer the images to be in a single column, as this looks a bit wonky. So, let’s move them! With this final change, the full code for my View page ends up as:
{% extends "base-recordview" %}
{% set resource_name="aircraft" %}
{% block header %}
<sp-split-row>
    <div slot="left">
  <sp-header style="margin-bottom: 0">
    <sp-column>
      <sp-heading size="2xl" level="1">
          {% block title %}
              <platform-component package-name="recordpage" name="RecordDefiner"></platform-component>
          {% endblock title %}
      </sp-heading>
        <sp-row style="--sp-row-spacing: var(--sp-spacing-3);">
          <sp-icon icon="details"></sp-icon>
          <span>Aircraft </span>
      </sp-row>
    </sp-column>
     </sp-header>
    </div>
    <div slot="right" style="text-align: right;">
        <sp-header style="margin-bottom: 0">
        <sp-heading>
    <platform-component package-name="recordpage" name="RecordTemplate" template="{{'<a href="/platform/page aircraft-edit?uid={{UID}}"> <sp-button>Edit</sp-button>'}}"></platform-component>
    </sp-heading>
      </sp-header>
    </div>
  </sp-split-row>
{% endblock header %}
{% block body %}
<sp-responsive-columns>
  <div>
     <sp-record-row>
    <span slot="label">Hyperspace</span>
    <platform-component package-name="recordpage" name="RecordFieldView" field-name="Hyperspace"></platform-component>
  </sp-record-row>
  <sp-record-row>
    <span slot="label"># of Seats</span>
    <platform-component package-name="recordpage" name="RecordFieldView" field-name="Seats"></platform-component>
  </sp-record-row>
     <sp-record-row>
    <span slot="label">Release Date</span>
    <platform-component package-name="recordpage" name="RecordFieldView" field-name="ReleaseDate"></platform-component>
  </sp-record-row>
  <sp-record-row>
    <span slot="label">Last Service Date</span>
    <platform-component package-name="recordpage" name="RecordFieldView" field-name="LastService"></platform-component>
  </sp-record-row>
    </div>
  <div>
     <sp-record-row>
     <span slot="label">Branding</span>
        <platform-component package-name="recordpage" name="RecordTemplate" template="{{'{% if Branding == "Rebellion" %} <img src="https://starwarsblog.starwars.com/wp-content/uploads/2015/11/rebel-symbol-536x536.jpg" alt="Rebellion" width="100" height="100">{% else %}
<img src="https://starwarsblog.starwars.com/wp-content/uploads/2016/02/imperialseal-536x536.jpg" alt="Empire" width="100" height="100">{% endif %}'}}"></platform-component>
    </sp-record-row>
    <sp-record-row>
      <span slot="label">Image</span>
      <platform-component package-name="recordpage" name="RecordTemplate" template="{{ '<img src="{{Image}}" alt="{{name}}" width="200" height="200">' }}"></platform-component>
    </sp-record-row>
  </div>
  </sp-responsive-columns>
{% endblock body %}
And the page looks like this:
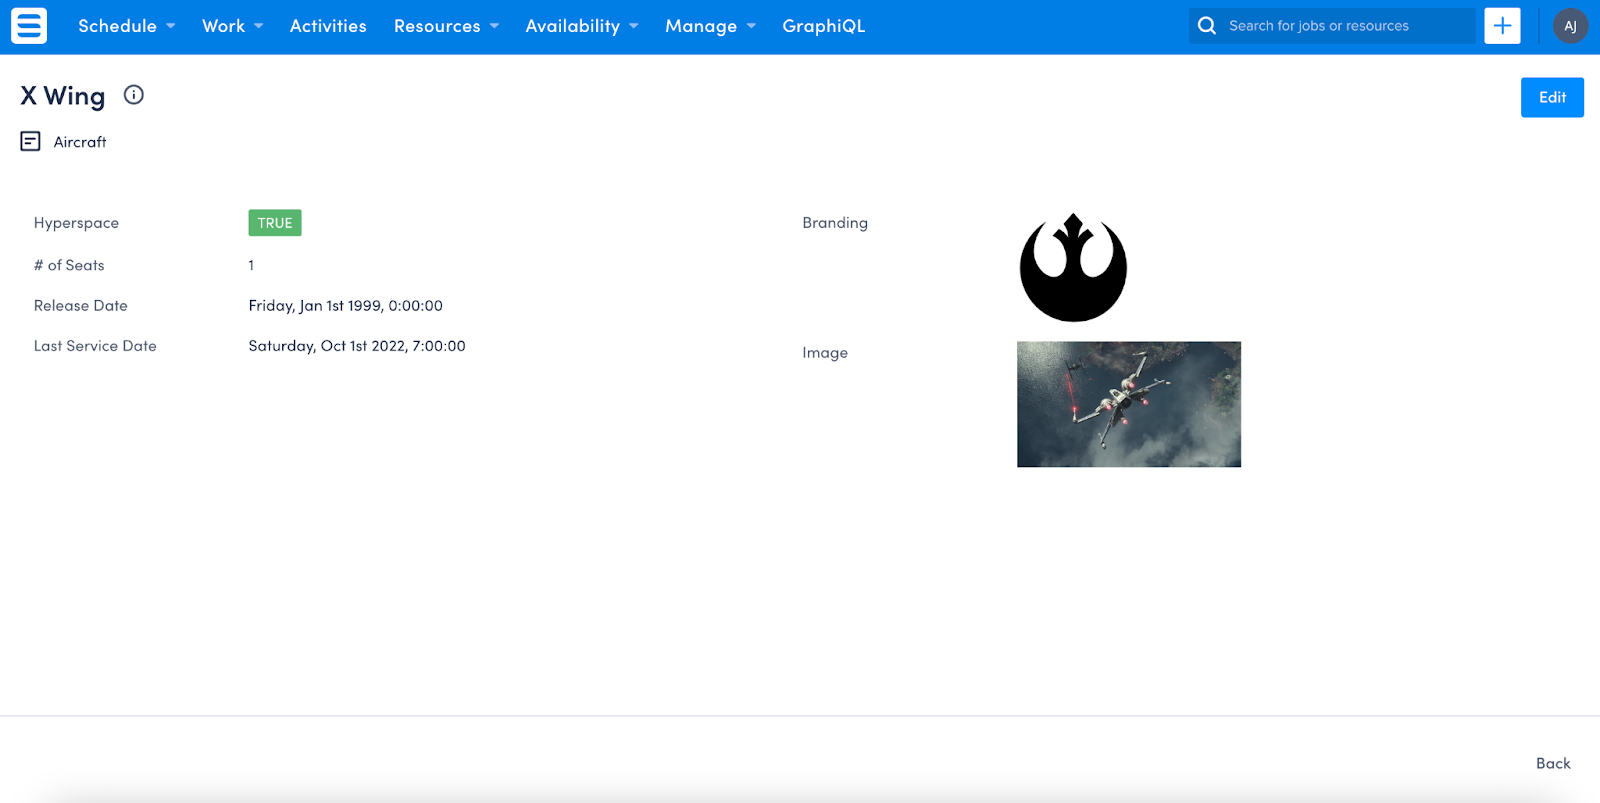
Much, MUCH better! Being the stickler for continuity that I am, I also update my Edit page so the fields are in the same order as my View page, to avoid confusing my users.
Join us here at Low Code Corner next time when we dive into adding relationships to other objects! And as always, if you have questions, reach out to us via the comments below or on Twitter @SkeduloDevs