Episode #2 - Putting your Skedulo record pages into Hyperspace

Welcome back, Low Coders! Did you know that whenever you create a custom object on the Pulse Platform, by default you get a View, Create, Edit, and List View page automatically created for you? Well you do! And did you know that you can further customise these to supercharge them for you and your users? Come, step into my office while we make lives better for you, your users and the general galaxy.
Your users are busy. They are important people servicing the whole galaxy and they rely on Skedulo to give them the information they need to do their jobs. This information needs to be more than just data on a page. It needs to be intuitive, easy to access and quick to comprehend. Updating your record pages gives you the opportunity to flex your hyperdrive and give your users the data they need in a format they love.
View pages
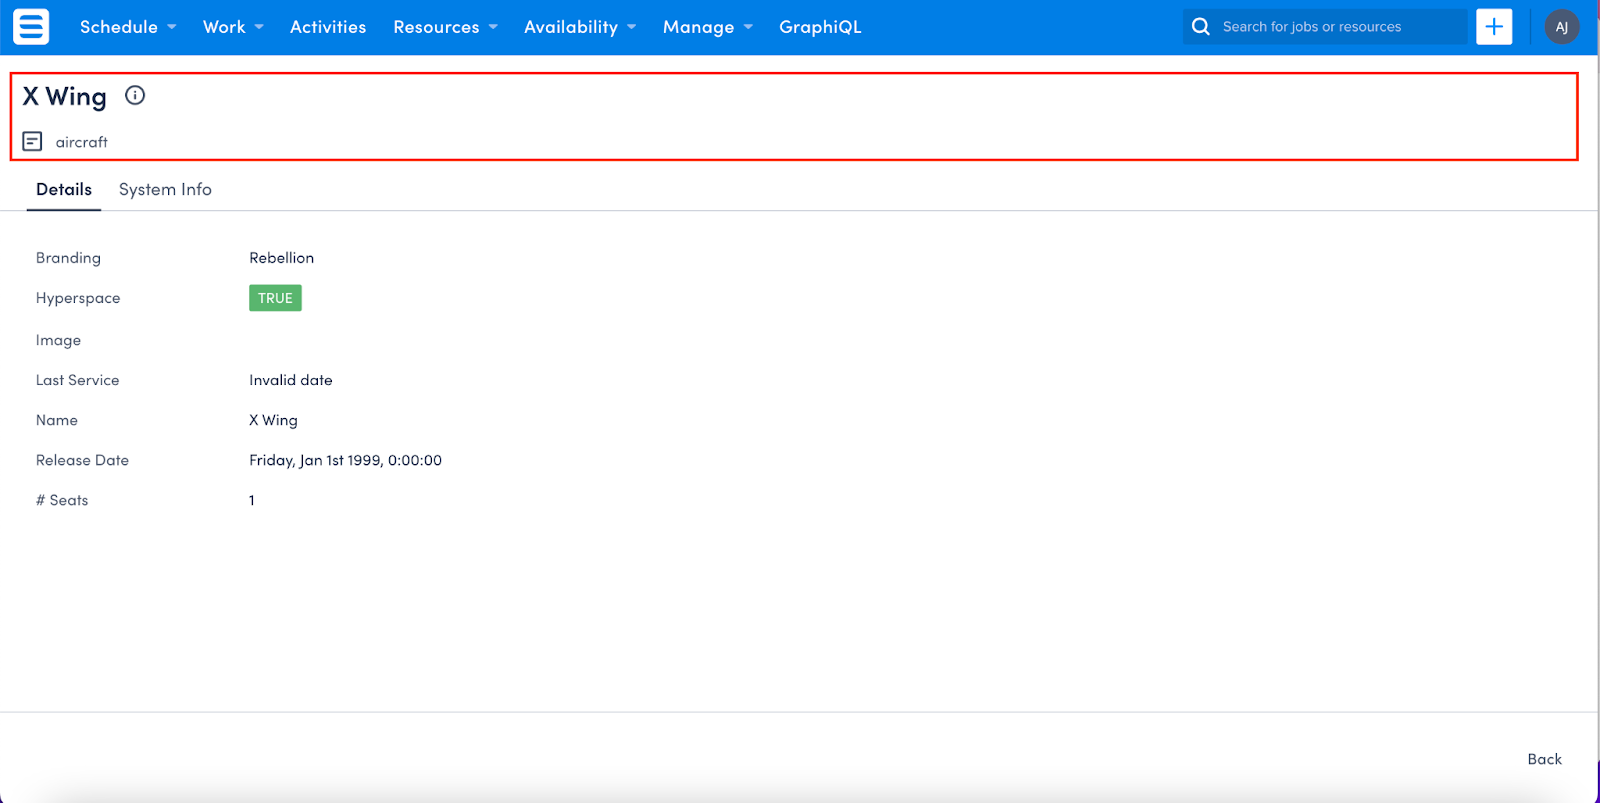
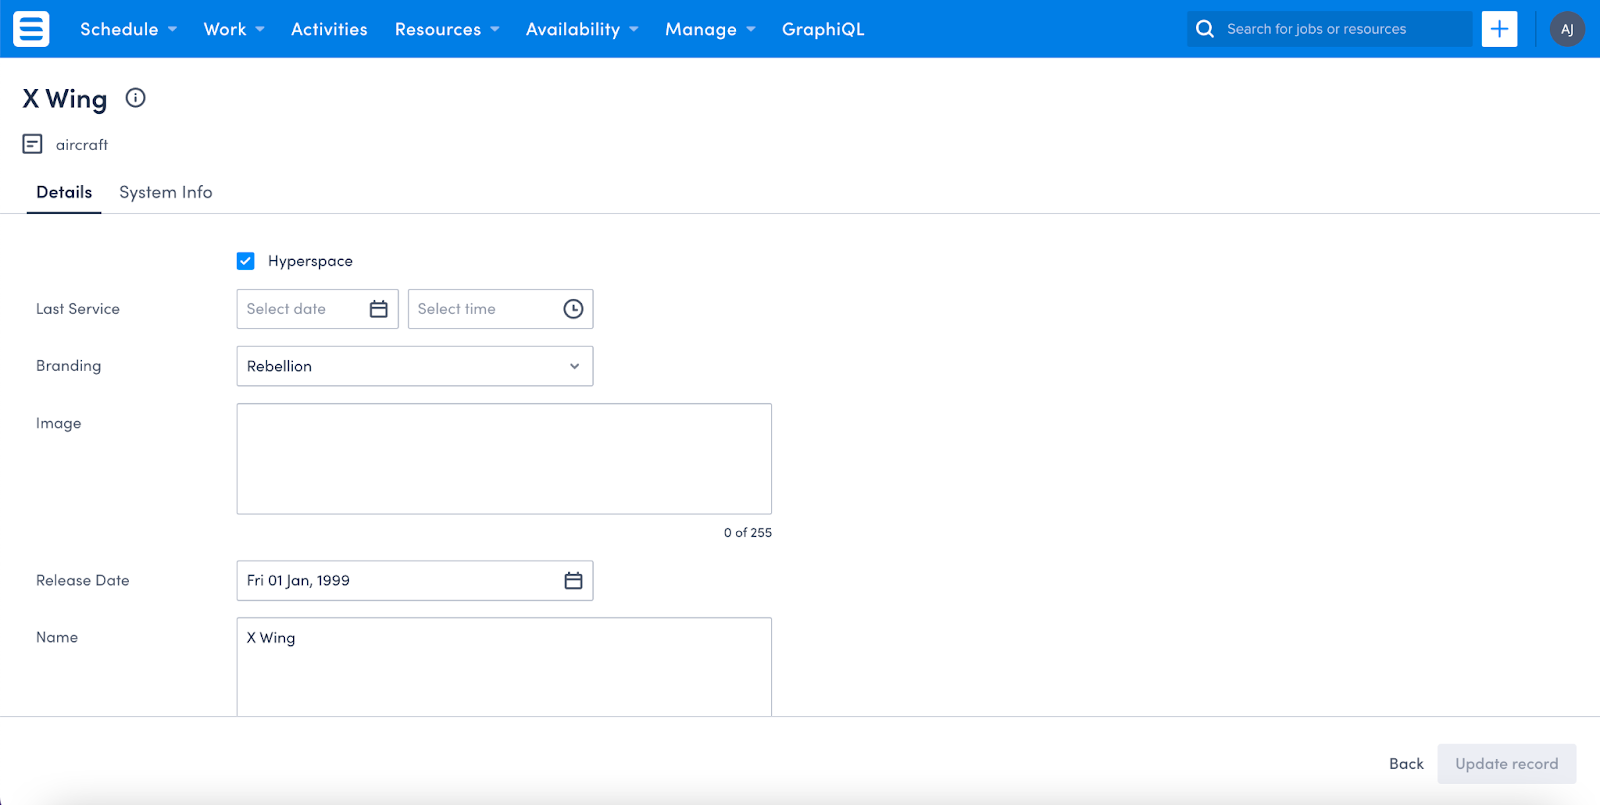
Let’s take a look at the Aircraft object that I built. It stores high-level information about the aircraft that our somewhat fictitious galactic company services. It has a handful of fields, and when I go to look at the page it looks like this:
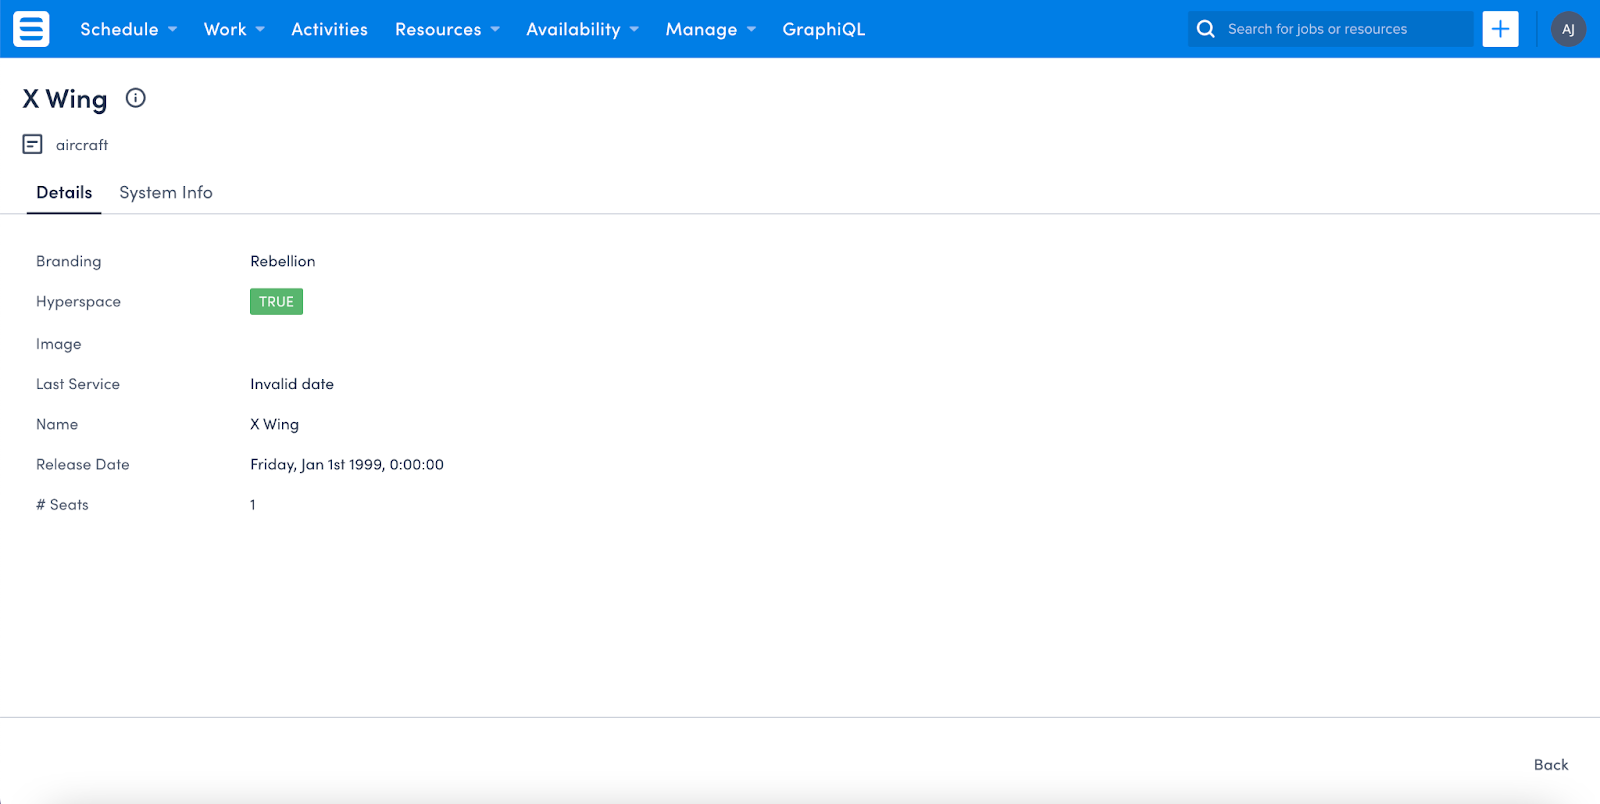
Looks OK, but the fields are shown alphabetically. This is not really the way people are going to want to see this information. So we are going to give this page a makeover to provide our users with data in a way that really helps them. Let’s go!
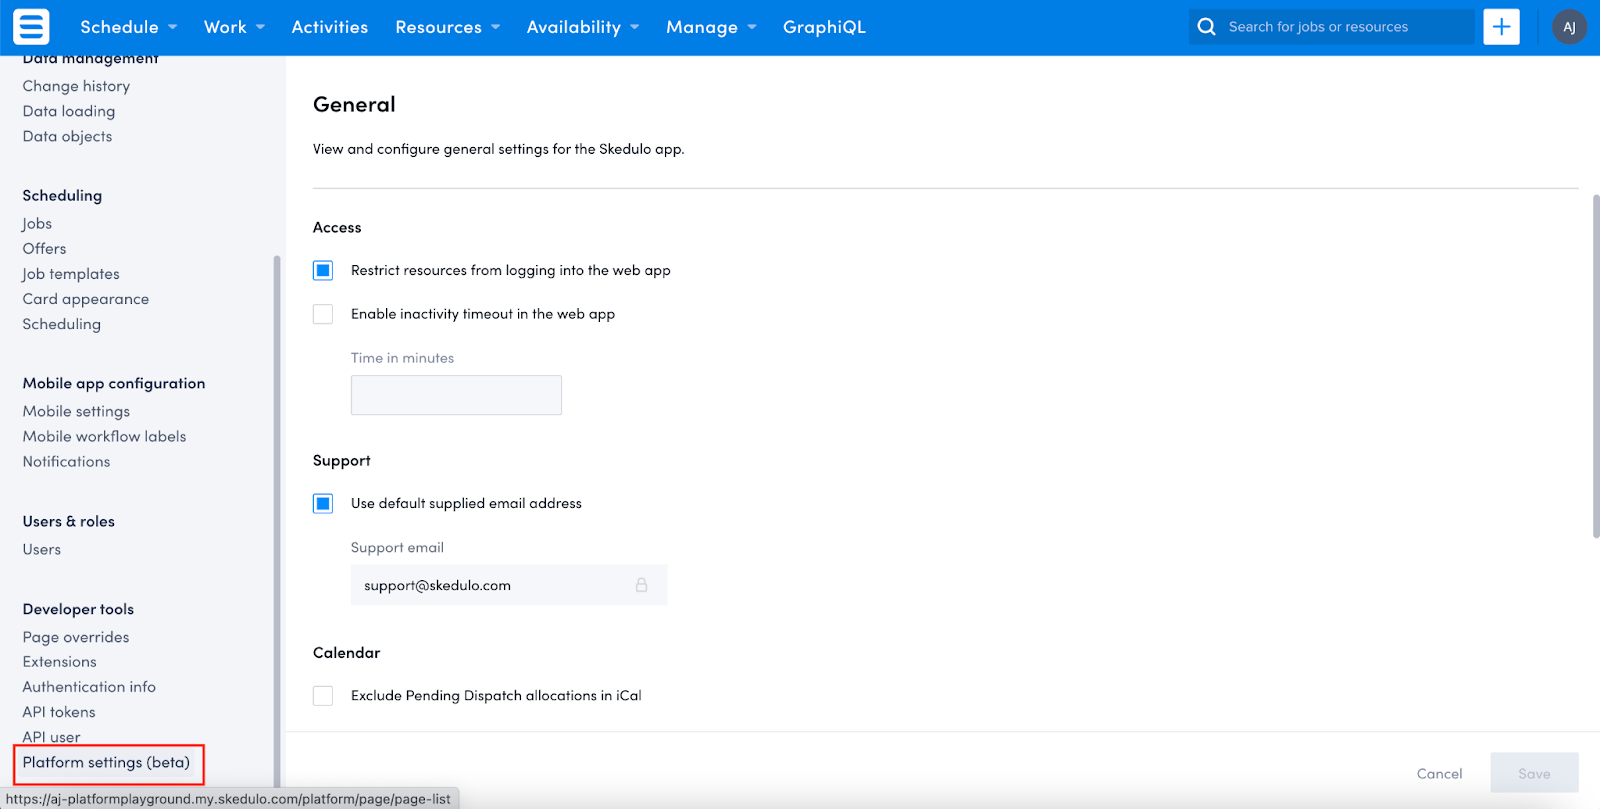
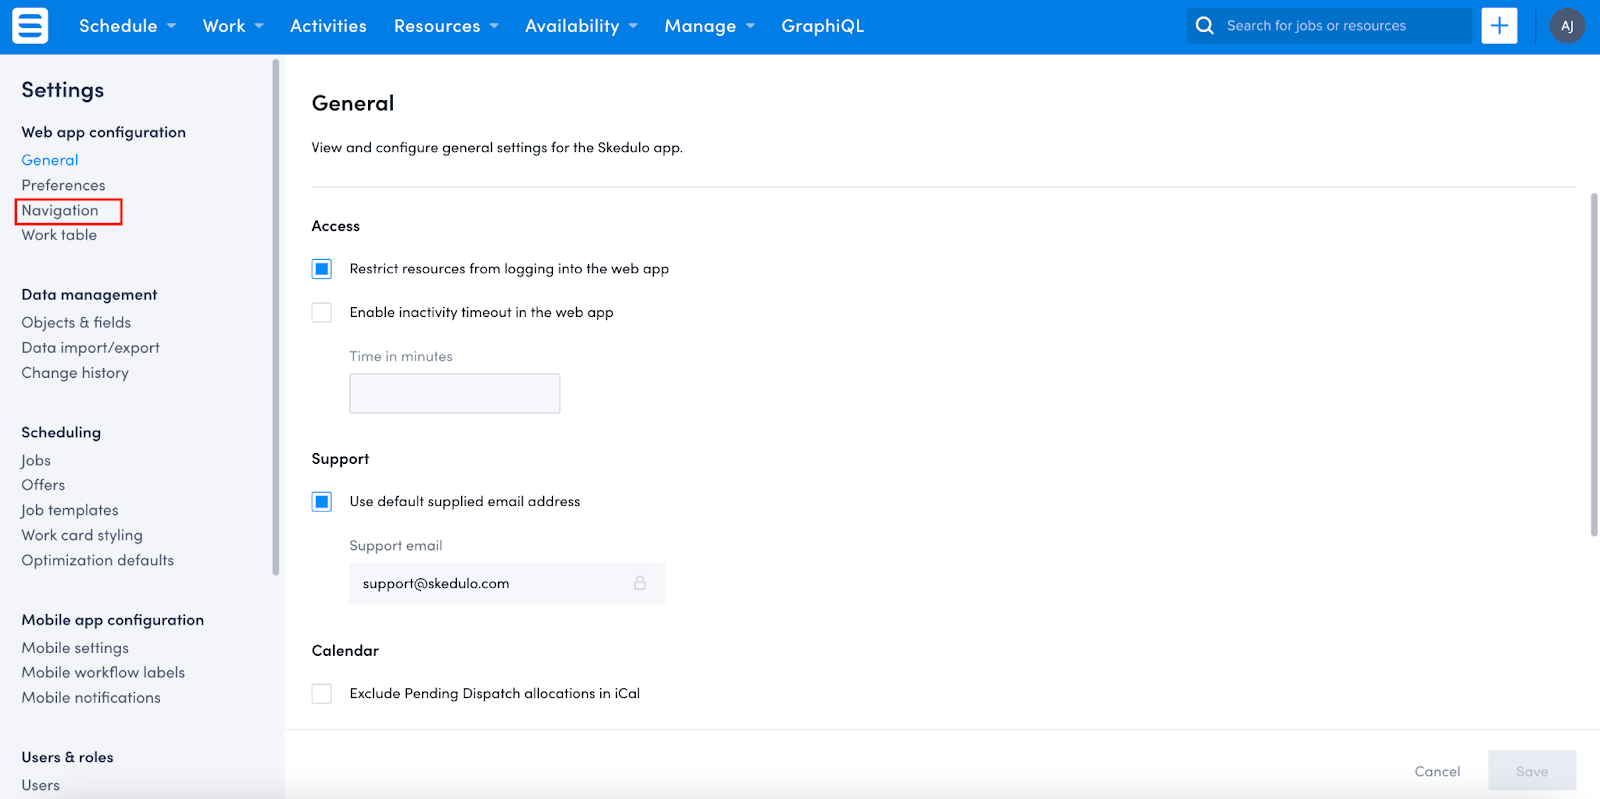
Once you create a custom object, you get pages automatically created for you. These can be found in your setup area under Platform Settings (beta):
Once you get to your platform pages list, you will need to find the ones you want to update.
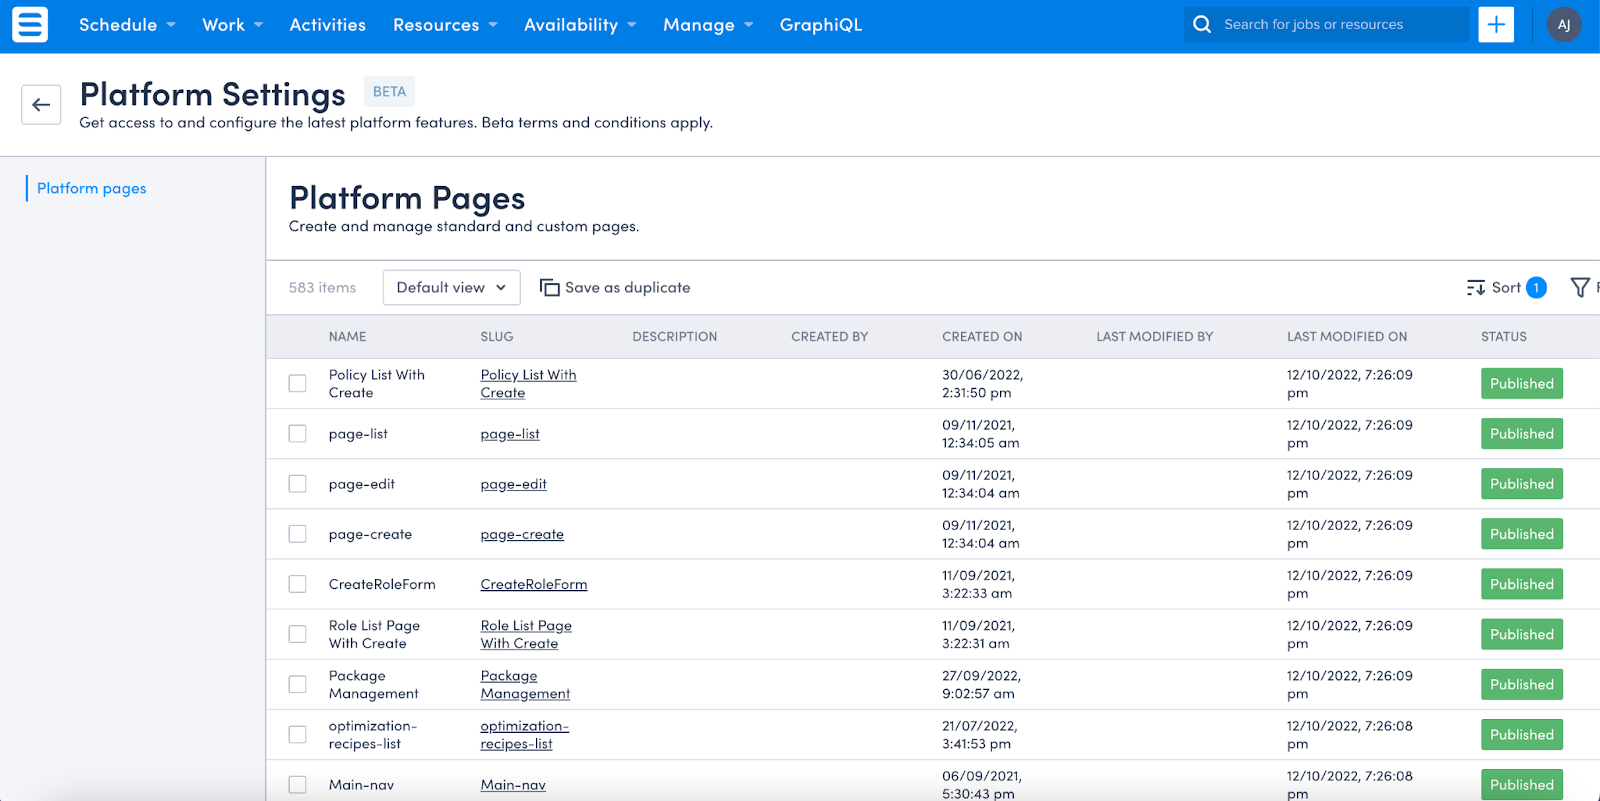
You can manually scroll through the list, or better yet, add a filter!
Go to the right of the page and click on Filters. This will then give you the option to Add filter.
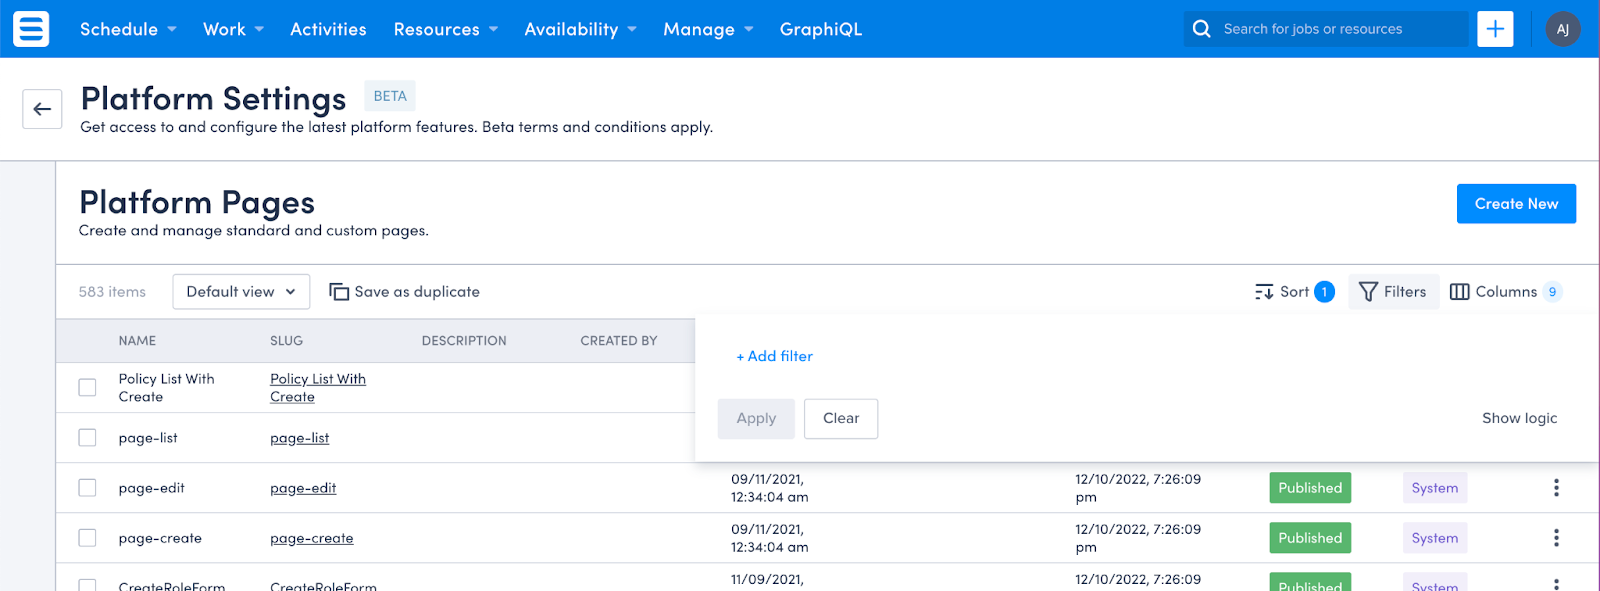
By default the filter assumes you want to filter based on Page Name, which is exactly what we want (although go ahead and check out the other options so you know what you can access later). If you happen to know the name of the page you’re after, you can use the Page Name > equals filter, but if you’re not completely sure you can use the contains function. I generally use contains, but it’s a personal preference.
I called my object aircraft, so that’s what I put in and then click Apply.
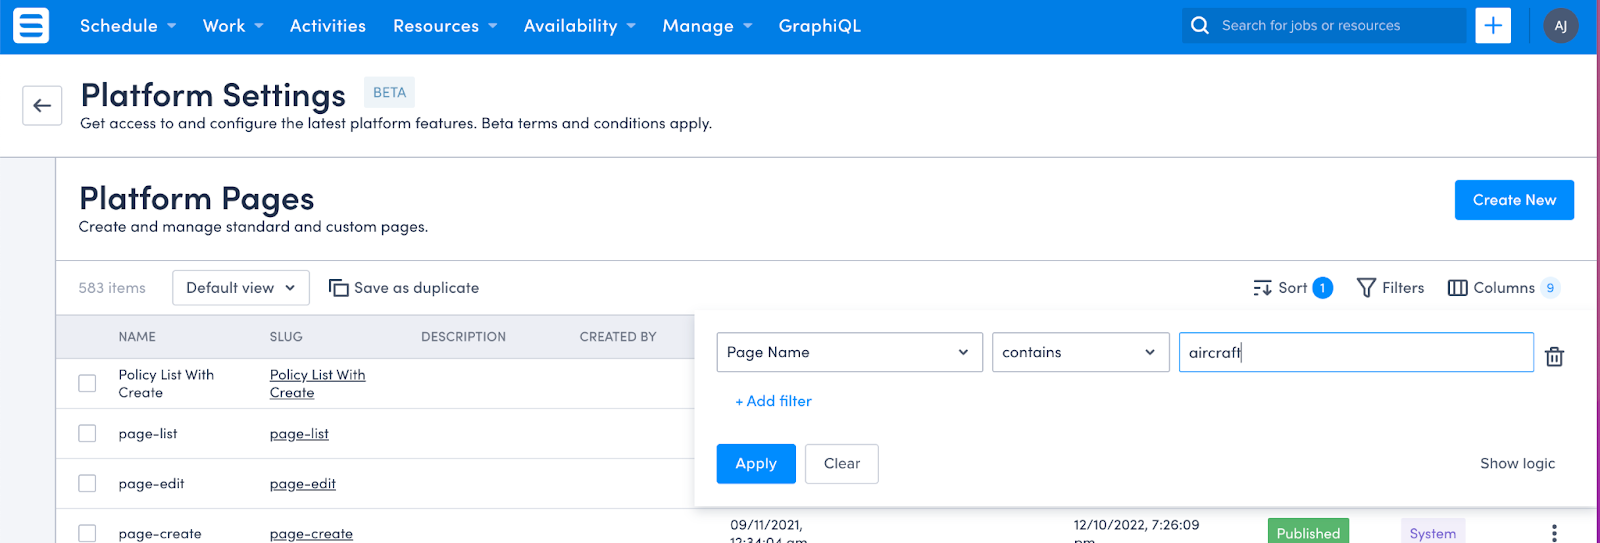
Bingo! We have a list of all the pages where the name of the page contains the word aircraft.
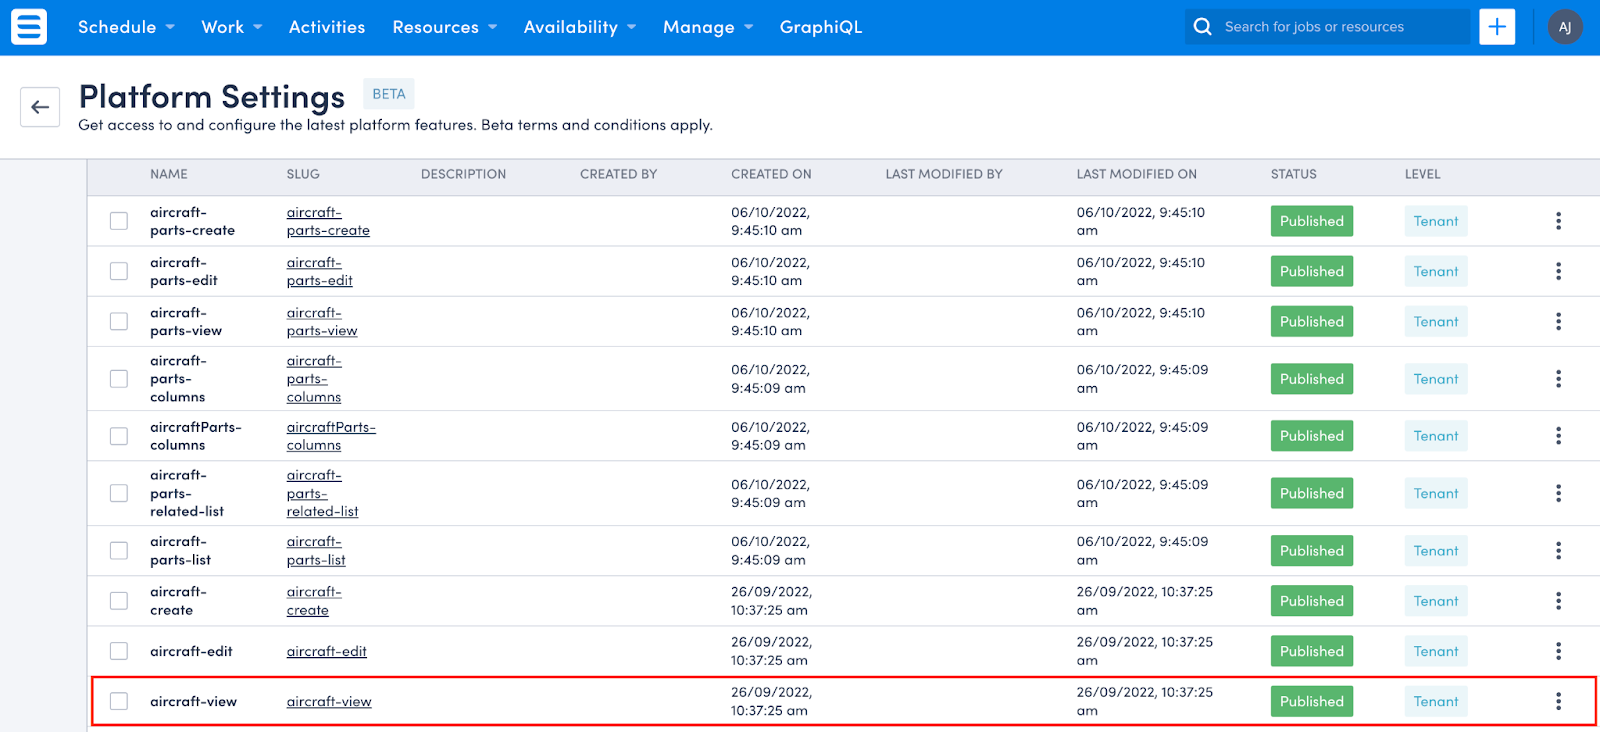
To start with I want to update the View page for my aircraft, so I click on the aircraft-view page.
What we see is the name of the page, and the page type, as well as the Template Content. The template content is where we want to be. This is the part where we can tell Skedulo what to display and in what order. Each page is made up of three parts; the Header, Body and Footer. We’re going to dive into the Header and Body sections, as the Footer looks good as it is. If you wanted to change the Footer, you’d simply apply your changes in the same Template Content section.
The header section
By default, if you have a name field, it will populate this at the top (thanks, Skedulo!). However, I want to change the aircraft wording to proper case (because I like proper case a LOT). I also want to pop an Edit button on the right hand side to make life easy for my users to keep their data up to date.
Now, it is important to note that if you want to change ANY part of the header (or body or footer) you need to include all the components in your template (otherwise they will simply not render at all). Given I don’t want to change the Name of the header, but I do want to change the other parts, I need to make sure the header still contains the name.
Now, we all know that I’m not a developer, so I head on over to the documentation to see how we go about making changes. This article will walk you through step by step how to change your page, and it’s absolute gold. To be honest the article explains each step better than I can, so I’ll walk you through the changes I made to get my page to where I wanted.
Here’s the code I ended up with by following the article:
{% extends "base-recordview" %}
{% set resource_name="aircraft" %}
{% block header %}
<sp-split-row>
    <div slot="left">
  <sp-header style="margin-bottom: 0">
    <sp-column>
      <sp-heading size="2xl" level="1">
          {% block title %}
              <platform-component package-name="recordpage" name="RecordDefiner"></platform-component>
          {% endblock title %}
      </sp-heading>
        <sp-row style="--sp-row-spacing: var(--sp-spacing-3);">
          <sp-icon icon="details"></sp-icon>
          <span>Aircraft</span>
      </sp-row>
    </sp-column>
     </sp-header>
    </div>
    <div slot="right" style="text-align: right;">
        <sp-header style="margin-bottom: 0">
        <sp-heading>
    <platform-component package-name="recordpage" name="RecordTemplate" template="{{'<a href="/platform/page/aircraft-edit?uid={{UID}}"><sp-button>Edit</sp-button>'}}"></platform-component>
    </sp-heading>
      </sp-header>
    </div>
  </sp-split-row>
{% endblock header %}
I updated the sub-heading using the below code snippet:
 <sp-row style=”—sp-row-spacing:var(—sp-spacing-3);”>
 <sp-icon icon=”details”></sp-icon>
 <span>Aircraft</span>
 </sp-row>
I added the Edit button simply following along with the article. Save your page. Go back to your record view page and BOOM!! New Header!

We’ll be writing about adding fancy highlight sections to your header in a separate post, so keep an eye out for that one!
The body section
Moving onto the body of the page, which appears under the header and houses all the important information, this is where we will reorder the fields on the page to make it more logical for the users viewing the data.
Again, I followed along with the article and arrived with the below code:
{% block body %}
<sp-responsive-columns>
  <div>
   <sp-record-row>
     <span slot="label">Branding</span>
       <platform-component package-name="recordpage" name="RecordFieldView" field-name="Branding"></platform-component>
    </sp-record-row>
  <sp-record-row>
    <span slot="label"># of Seats</span>
    <platform-component package-name="recordpage" name="RecordFieldView" field-name="Seats"></platform-component>
  </sp-record-row>
     <sp-record-row>
    <span slot="label">Release Date</span>
    <platform-component package-name="recordpage" name="RecordFieldView" field-name="ReleaseDate"></platform-component>
  </sp-record-row>
  <sp-record-row>
    <span slot="label">Last Service Date</span>
    <platform-component package-name="recordpage" name="RecordFieldView" field-name="LastService"></platform-component>
  </sp-record-row>
    </div>
  <div>
   <sp-record-row>
    <span slot="label">Hyperspace</span>
    <platform-component package-name="recordpage" name="RecordFieldView" field-name="Hyperspace"></platform-component>
  </sp-record-row>
          <sp-record-row>
    <span slot="label">Image</span>
    <platform-component package-name="recordpage" name="RecordFieldView" field-name="Image"></platform-component>
  </sp-record-row>
  </div>
  </sp-responsive-columns>
{% endblock body %}
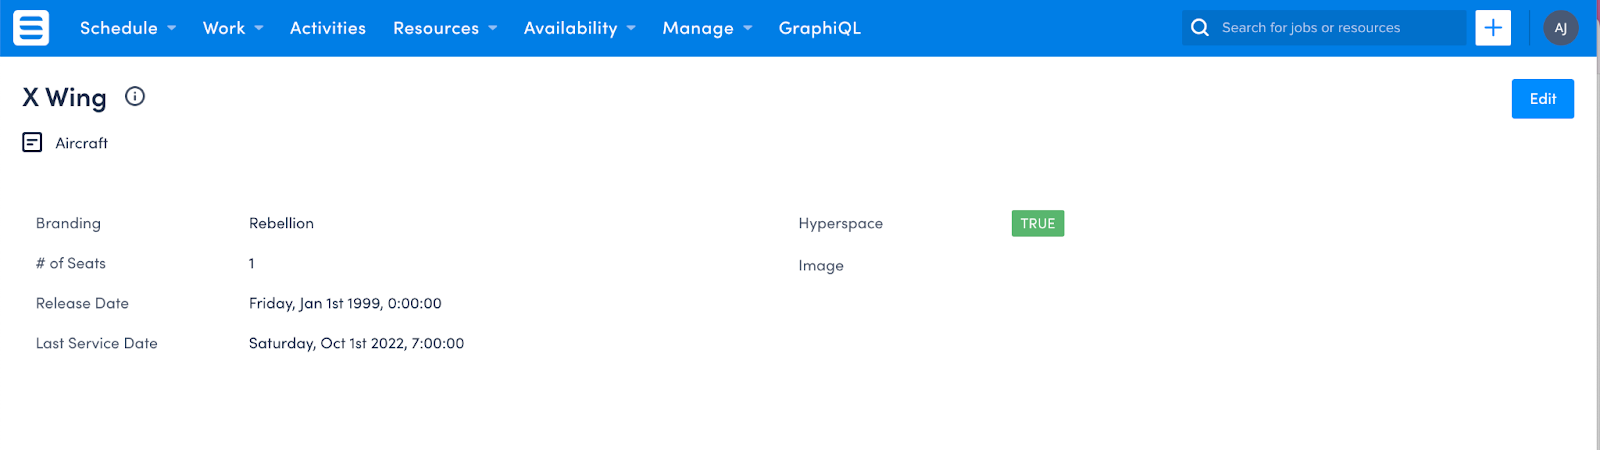
Now I have the fields in an order that makes sense for the users, across two columns (no scrolling!):
If you want to make changes to the footer for this page, you simply follow the steps from the amazing article we’ve been using so far!
We’ll go through how to add images to your page to make them pop in Episode 4 — I haven’t forgotten them I promise!
Edit pages
Your Edit pages also come out of the box (thanks again, Skedulo!) but sometimes you might want to have different fields when in edit mode than when you’re viewing the record. The most obvious choice for this is the Name field. When I’m editing or creating, I want to be able to include the name, but when I’m viewing it, I only need this field in the header of the page (redundant data is, well, redundant).
So for me, when I changed up my Edit page I made sure I kept the order of the fields exactly the same as my view page, but I included the Name as the first field.
Why keep your fields in exactly the same order? Well because users are probably viewing the data and then changing it using the Edit button. If the fields are suddenly in a different order than they were looking at it can be a bit jarring. So, let’s help everyone out where we can!
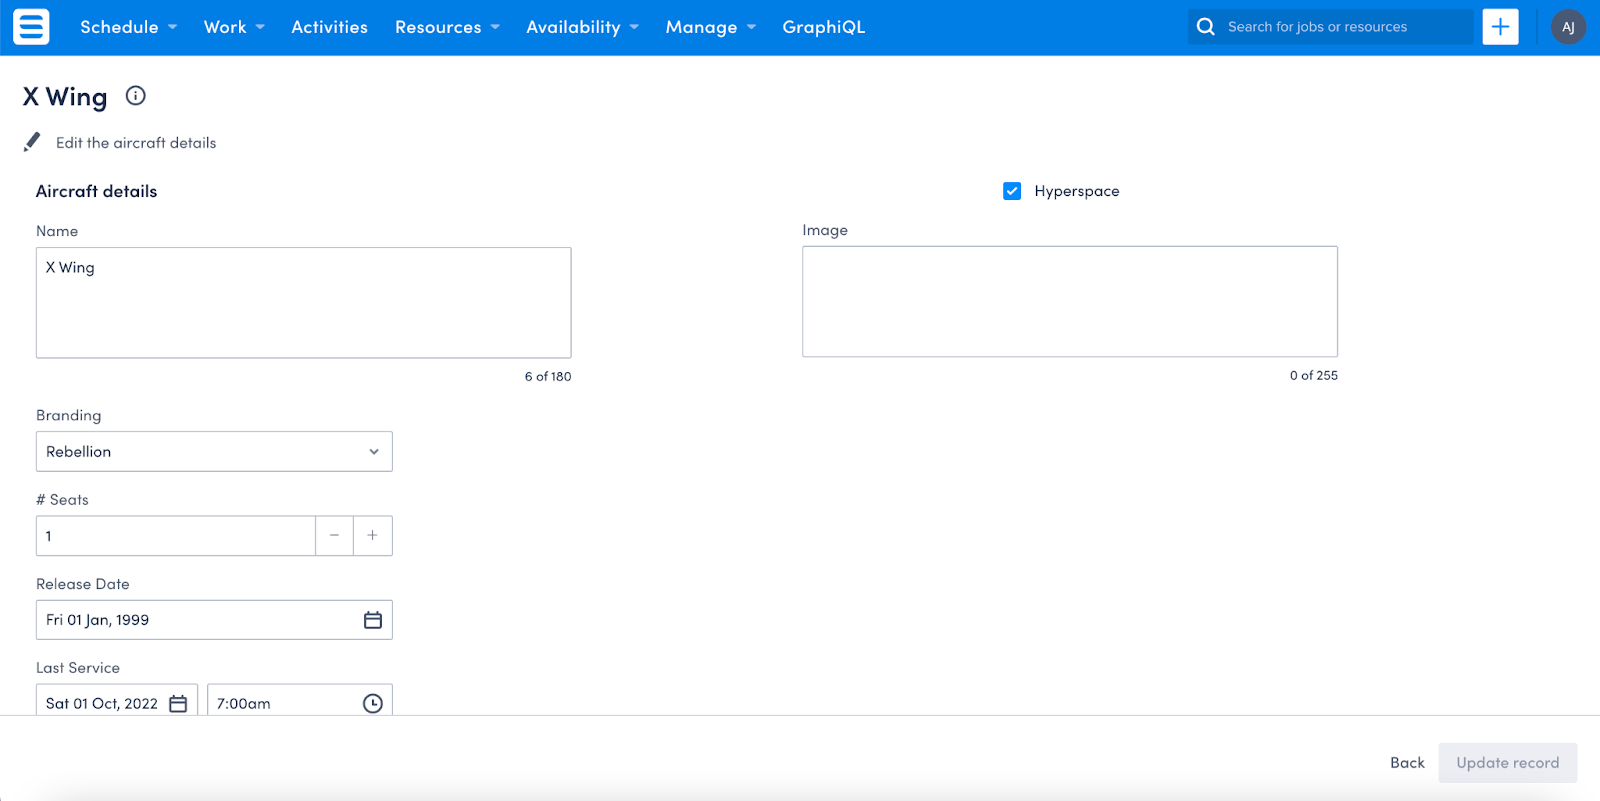
Before I change the code for my Edit page, the page renders like this:
The fields are not in the order I want them, and that pesky ‘aircraft’ sub-header is back. Following the fabulous documentation for Edit pages, I end up with this code:
And here’s my page! Everything’s back in the order I want it across both columns, and my sub-header now instructs people they’re editing the aircraft.
List views
We’ve given people a way to view and edit their records, but the last piece is the list view (so they can pick which record to view or edit). For this, you go to your Objects & fields (in the Data Management section of Settings), navigate to your object (in this case the Aircraft object) and click on Edit default columns.

Select the columns you want to display and then save your changes.
All we need now is a way to give this fancy new view to the users. Off to the Navigation Bar we go!
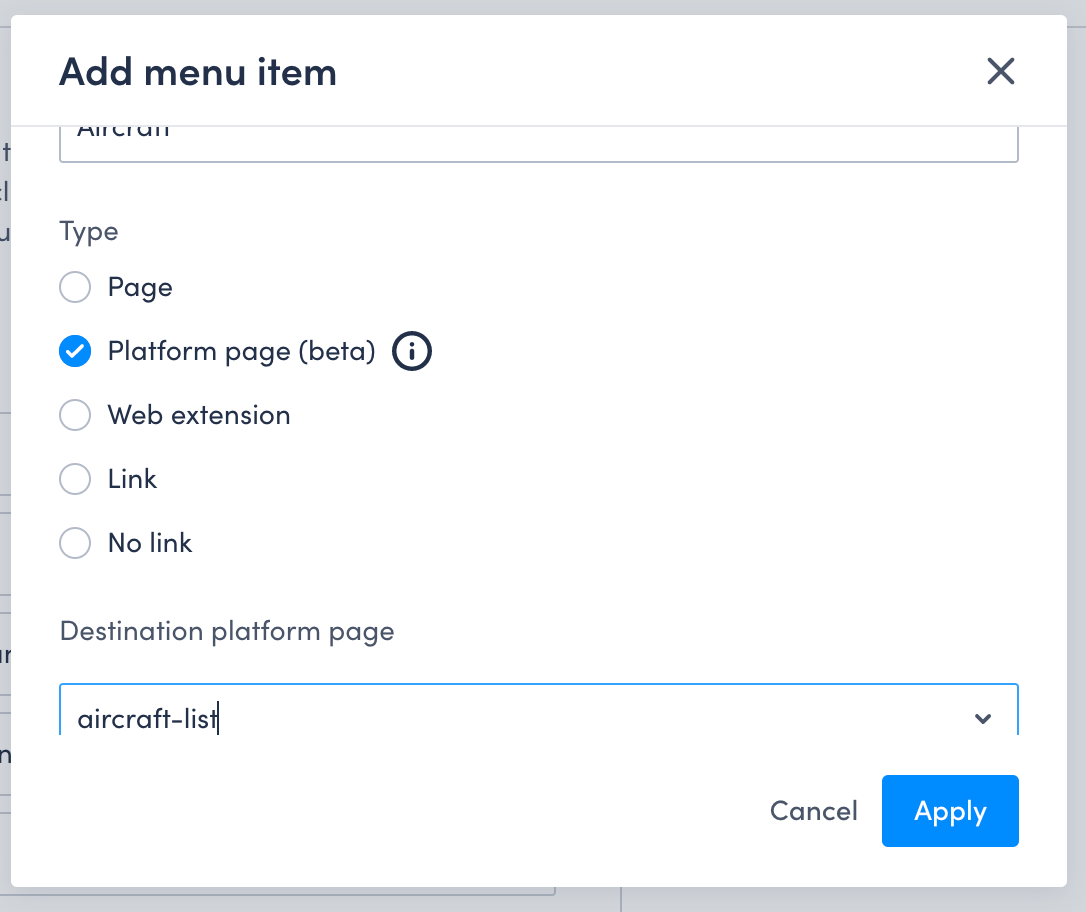
Remembering that Skedulo very kindly provides you with a default List page for each object you create, we simply need to add this to the navigation menu so it’s easy for users to access. I want this to appear in my Manage menu (but you may want it somewhere else, or as a brand new menu item of its own — dealers choice).
First, you click on Add Menu Item. Give your menu item a name, and then you want to make sure you’re pointing to the platform page for aircraft-list. After selecting Platform Page as the Type, you should find the correct page from the drop down.
Reorder the menu and you are all done!
For a more detailed explanation of just how beautiful you can make these list views, see the post here.
Join us here at Low Code Corner next time when we explore editing records directly from your list view. And as always, if you have questions, reach out to us via the comments below or on Twitter @SkeduloDevs