Episode #3 - Adding some extra zhoosh to your list views

Welcome back, Low Coders! Today we’re looking at how to edit records from your list views to help save on clicks. Your users are busy. They are important people servicing the whole galaxy and they rely on Skedulo to get their jobs done. We all know that the best data is both up-to-date and cleanly presented so we want to make it as easy as we can for you to achieve this. Your schedulers are looking at the list of fictitious aircraft that you service and they realise that there’s something not quite right. A simple click and they are in the record, ready to edit. It’s much easier than clicking into the aircraft record and clicking Edit to do the same task. Happier schedulers, and you get to look like the rebel who flew the Kessel Run in 12 parsecs.
So, we know that our aircraft can be accessed from the handy list view that is provided by Skedulo when you create a new object. However, when I go to look at my list, it’s pretty simple, even after I’ve added the columns I want (following along from this post) .
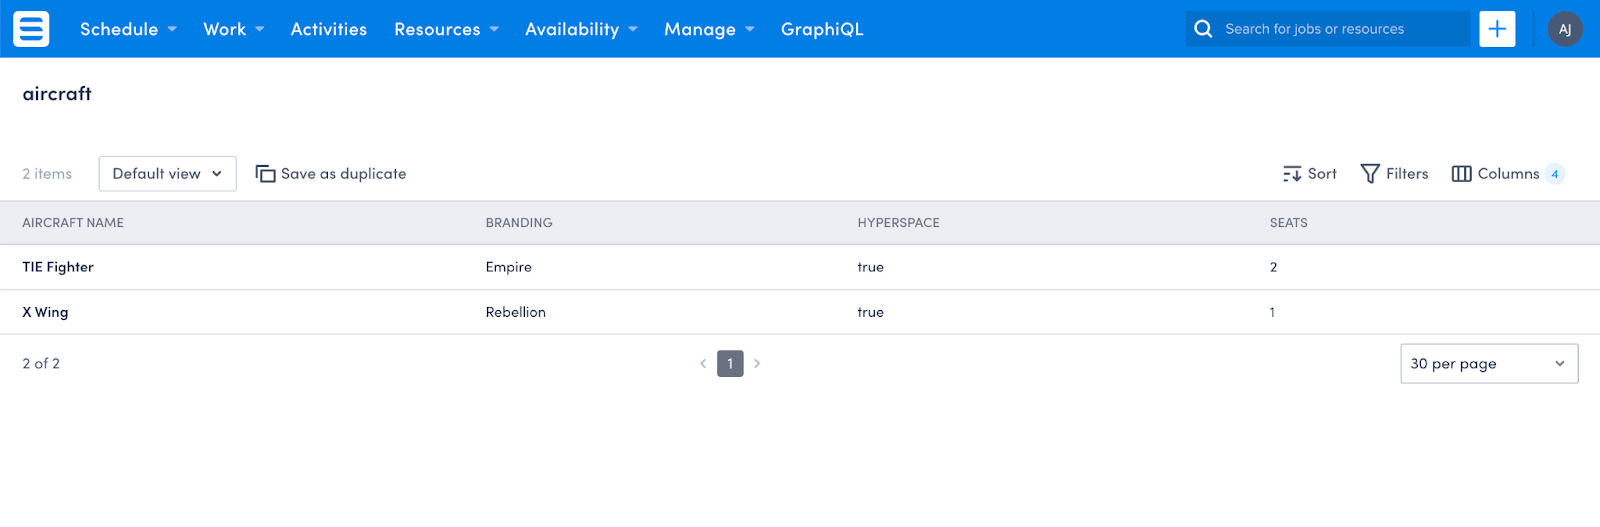
What I really want to do is allow my users to be able to edit or delete a record from the list, and I also want to allow them to add new records from this page as well. Just call me the time saving protagonist. (On another note, the title of this page bugs me. Bringing back my proper case is also covered today 🤷🏻♀️)
Adding Actions to your list view rows
Adding an Edit button to your list view rows is quite simple. Our trusty documentation shows us it’s as easy as adding a custom column to the default columns:
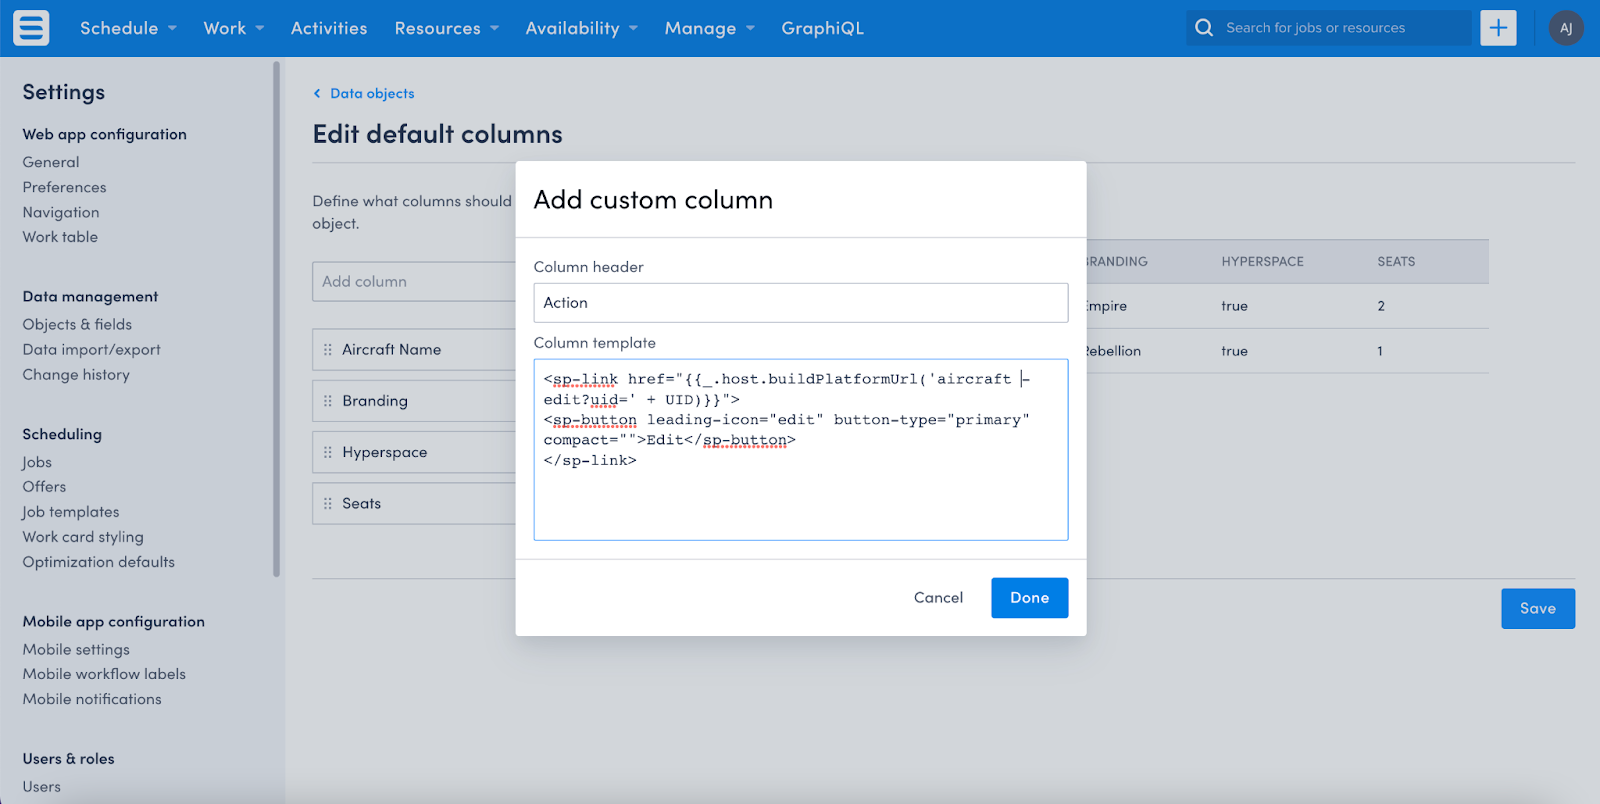
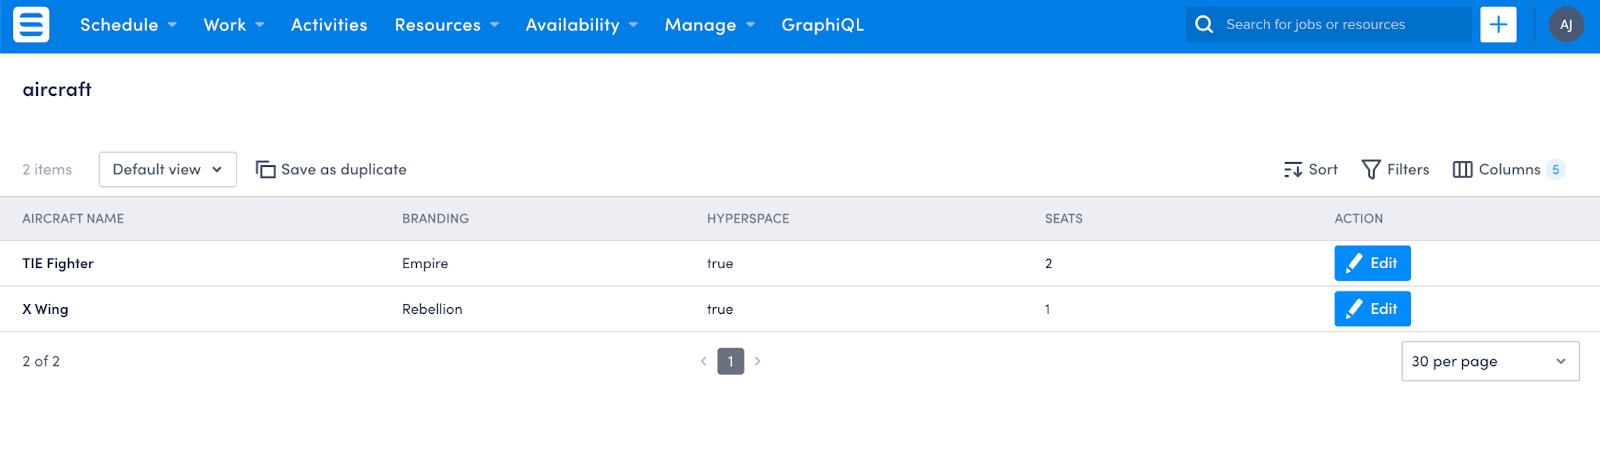
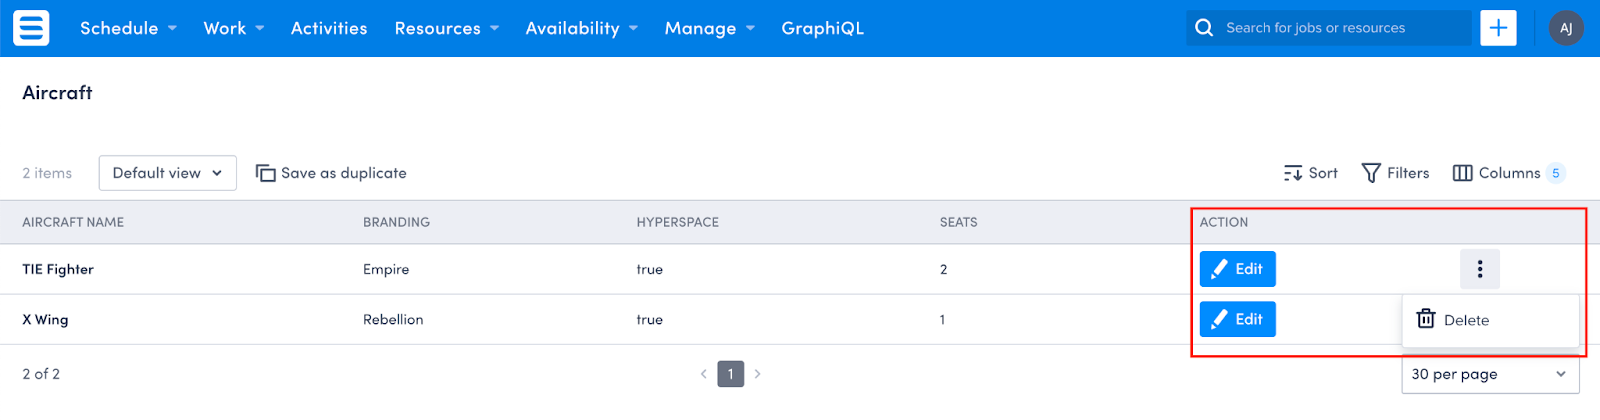
In yet another copy-and-paste stroke of excellence (with a quick update to the object name) I have a sparkly edit button on my list view!
Now, if you’re working with records where they should NEVER be deleted (think contracts or agreements) this is absolutely an excellent way to speed up the data entry for your users. But for my situation, that’s not enough! I want my users to keep their data clean and up to date, so I want them to be able to delete records as well.
So, I head to the fabulous documentation to override the list view templates. This shows us how to Add Row Actions, which is exactly what I want to do.
To make this change I need to edit the List View Template. To do this, I navigate to Platform settings (Beta) from the Settings menu and locate the aircraft-list page in the list.
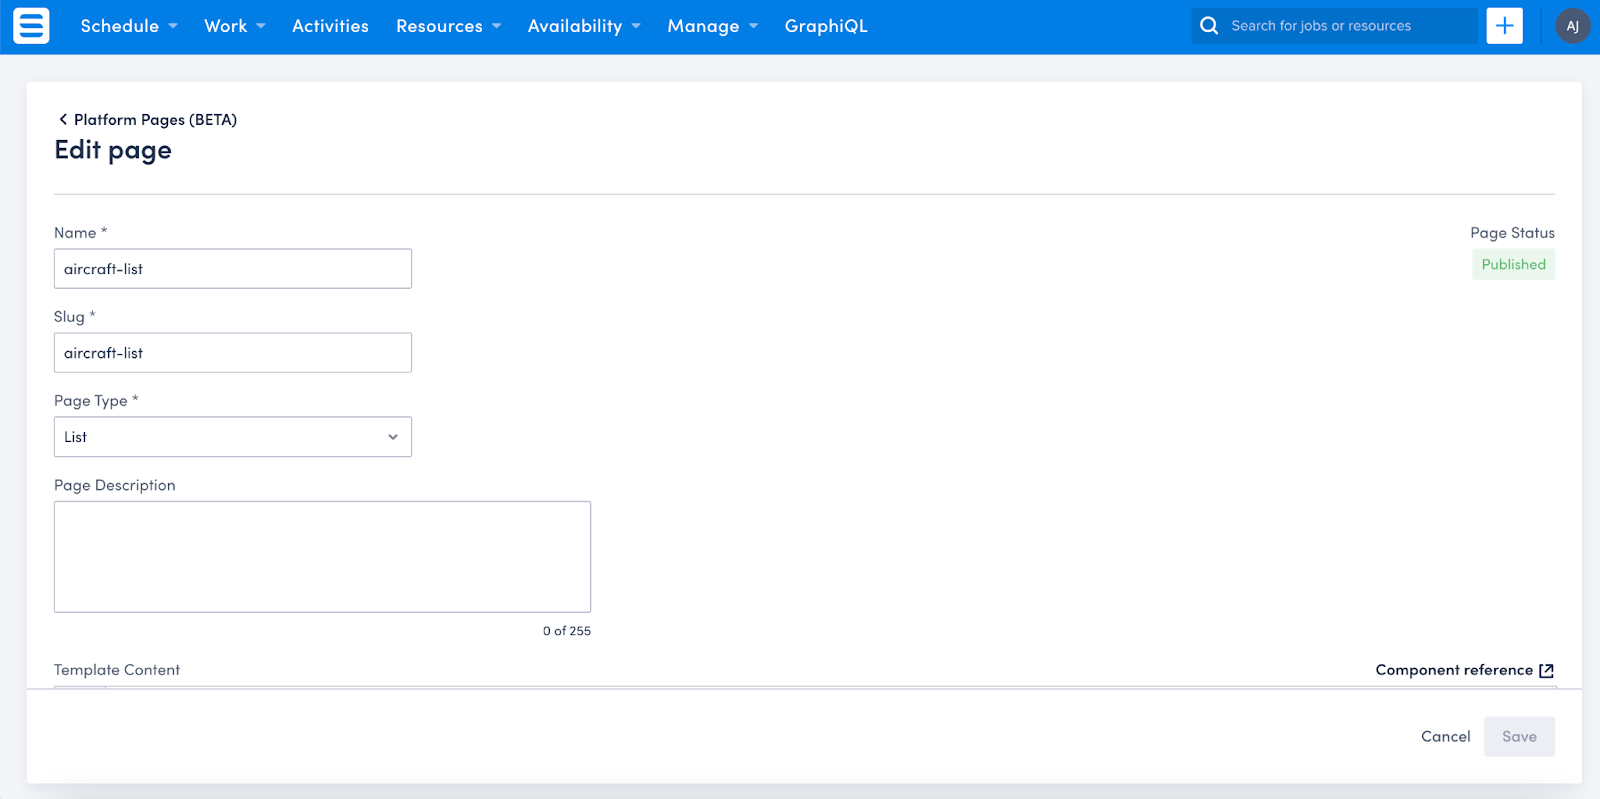
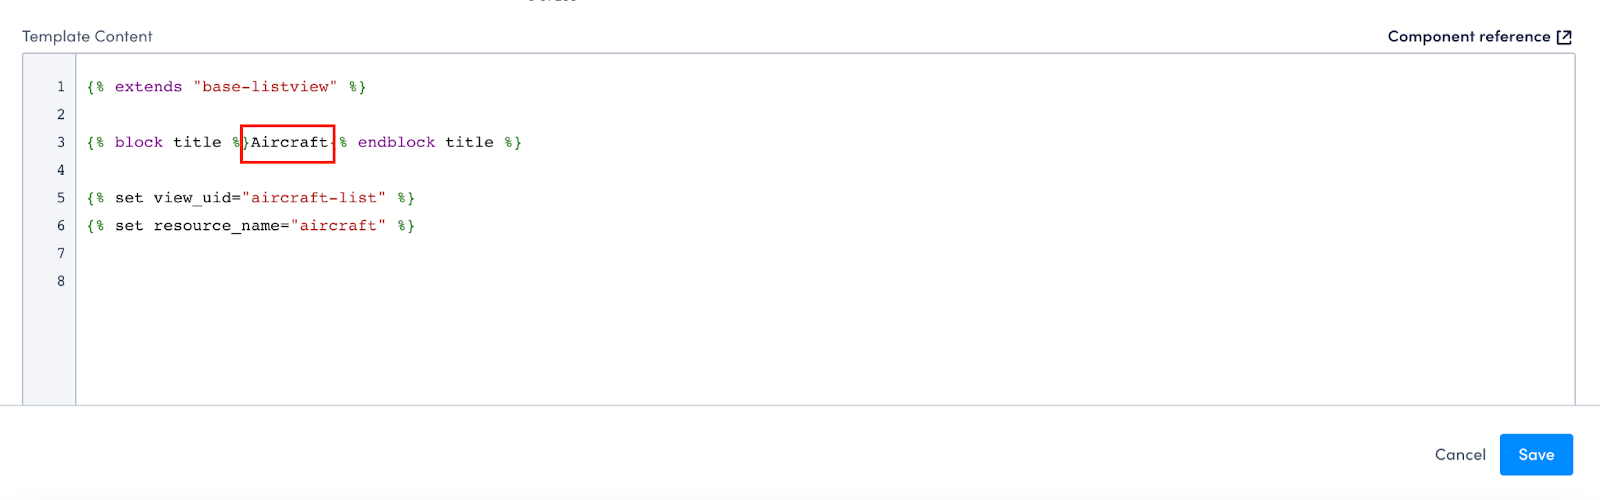
In the Template Content section, I can see that pesky ‘aircraft’ word. A simple update to proper case and clicking on Save gets me a nicer Title!
Well, that was a quick win! Onto adding row level actions.
Copying the example from the documentation on adding row level actions, I can now have the delete option next to my Edit button. This is ok, but I’d rather have the Edit & Delete as a single menu, not as two separate things:
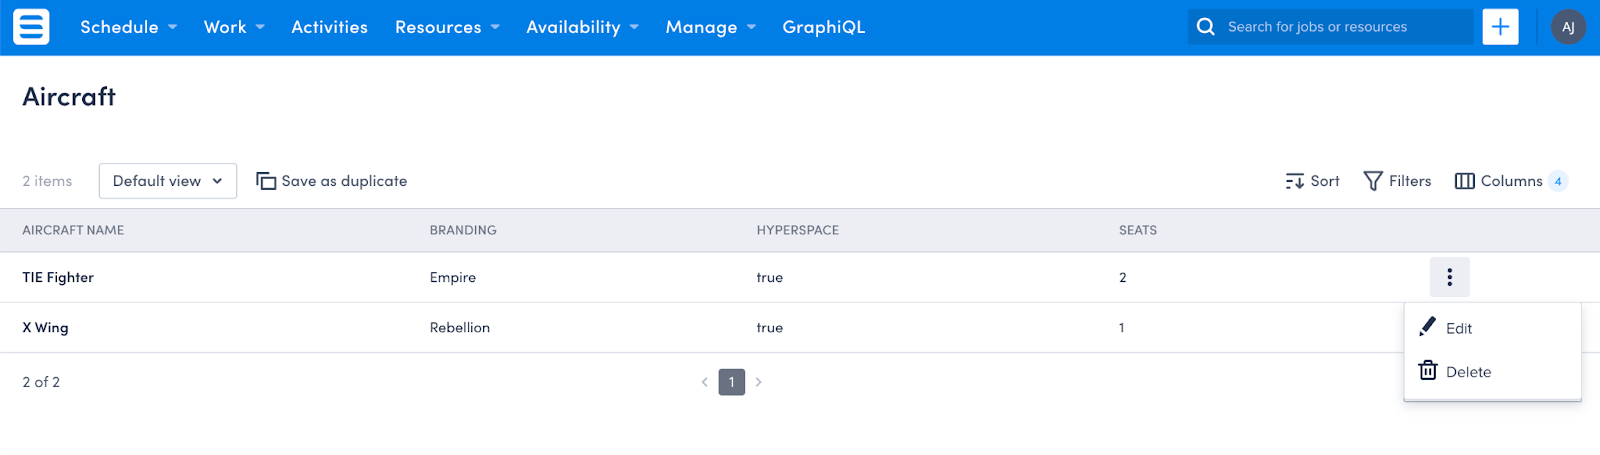
To get more than one action in the row level actions, you need to separate the actions using a comma, as below
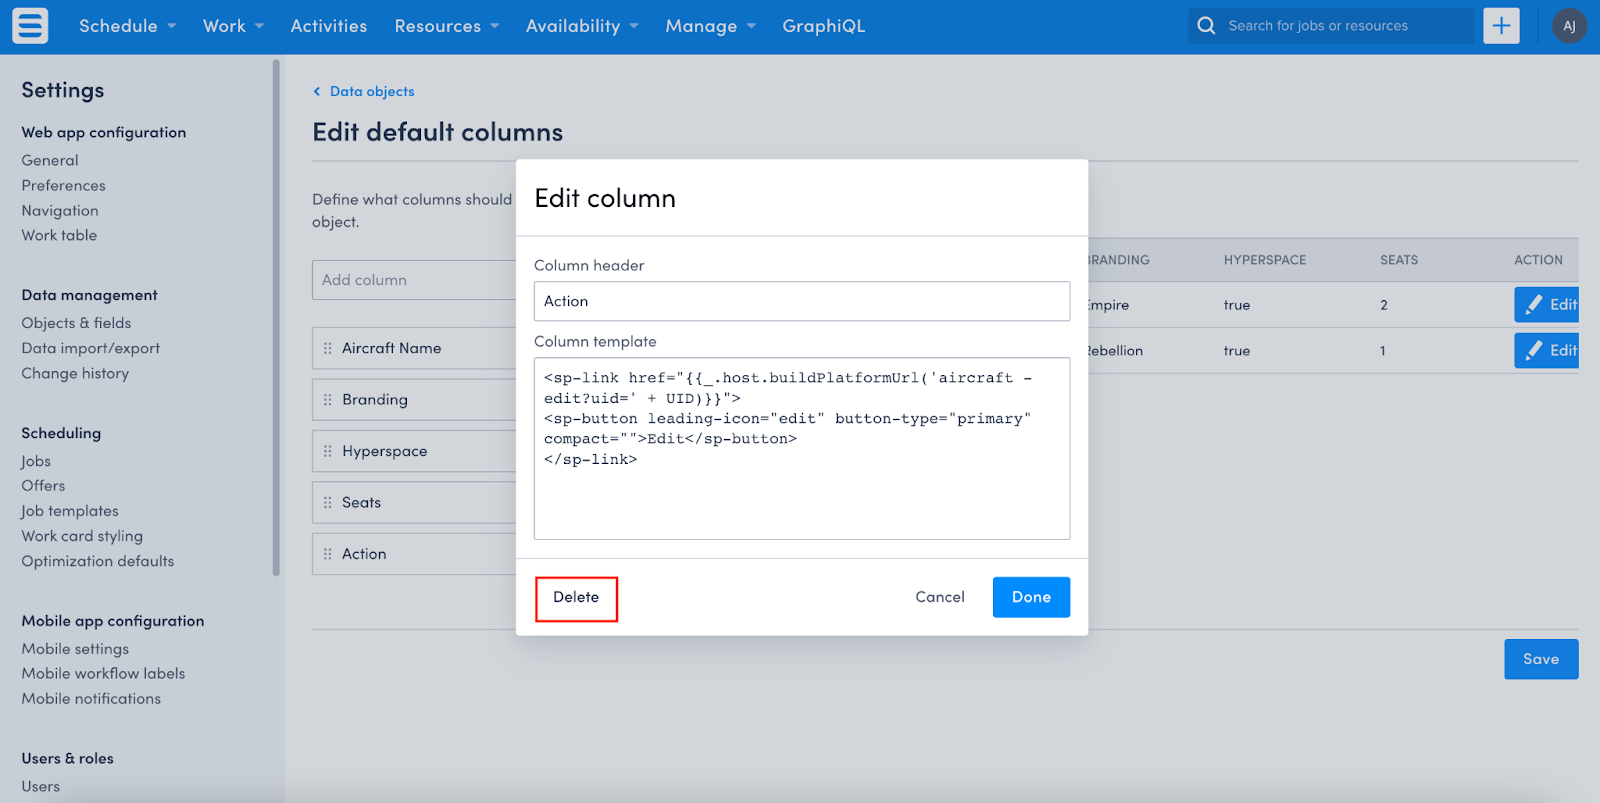
Now that I have both the actions in the row, I can go and remove the Edit button (as this is now completely redundant). Back to your default columns, and when you edit the custom column we created earlier, you can use the Delete button to remove the column altogether.
Look at that. It’s a thing of beauty!
Adding an Edit button to your list view page
Our trusty documentation shows us very clearly how to add a button to the list view page to allow users to add new records. It’s a matter of copy-and-paste and then applying your updates (i.e. changing the Object name, maybe swapping the wording of the button if you’re feeling frisky) to make the button your own. Here’s the code I ended up with
{% set row_actions="[{\"action\":\"edit\",\"label\":\"<a href=\\\"/platform/page/aircraft-edit?uid={{ UID }}\\\"><sp-row vertical-align=\\\"middle\\\"><div><sp-icon icon=\\\"edit\\\"><\/sp-icon><\/div><div> Edit<\/div><\/sp-row><\/a>\"},
{\"action\": \"delete\", \"label\": \"<sp-row vertical-align=\\\"middle\\\"><div><sp-icon icon=\\\"trash\\\"></sp-icon></div><div> Delete</div></sp-row>\", \"confirmationMessage\": \"Are you sure you want to delete?\", \"successMessage\": \"Aircraft deleted successfully!\" }]" %}
Look at our fancy page! Adding new records, as well as editing and deleting from each row! You go, you good thing.
{% extends "base-listview" %}

{% set view_uid="aircraft-list" %}
{% set resource_name="aircraft" %}

{% block header %}
<sp-split-row>
  <div slot="left">
    <sp-column>
      <sp-heading size="2xl" level="1">
        {% block title %}
          Aircraft
        {% endblock title %}
      </sp-heading>
    <sp-row style="--sp-row-spacing: var(--sp-spacing-3); color: var(--sp-color-neutral-600);">
      <sp-icon icon="details"></sp-icon>
      <span>List of machines</span>
    </sp-row>
    </sp-column>
  </div>
  <div slot="right" style="text-align: right;">
    <sp-heading>
      <a href="/platform/page/aircraft-create">
        <sp-button>Add new record</sp-button>
      </a>
    </sp-heading>
  </div>
</sp-split-row>
{% endblock header %}
One thing to remember is that if you start changing the header (to include your fancy button), make sure you remove the Title block (which we updated earlier). If you leave it in as well as changing the header, your whole page won’t render at all!
Join us here at Low Code Corner next time when we explore adding images to make your pages pop. And as always, if you have questions, reach out to us via the comments below or on Twitter @SkeduloDevs