Episode #8 - Pre populating data to win hearts and minds

Welcome back, Low Coders! In this episode we are looking into how to absolutely become a hero for your workers. You’ve created pages with beautiful pictures, related lists with meaning and now we will remove one more click from the lives of our amazing teams by pre-populating data for them. Are you the rebel who will save the universe with this move? Well, yes. You might just be. No one likes extra clicks and typing when keeping their data up to date. Your mission today is to make life easier for your team.
When you created your aircraft records, you gave your users the ability to not only view the related parts and fleet assignments, but a way to add new parts or assignments. However when you click on the Add button, none of the data is pre-populated.
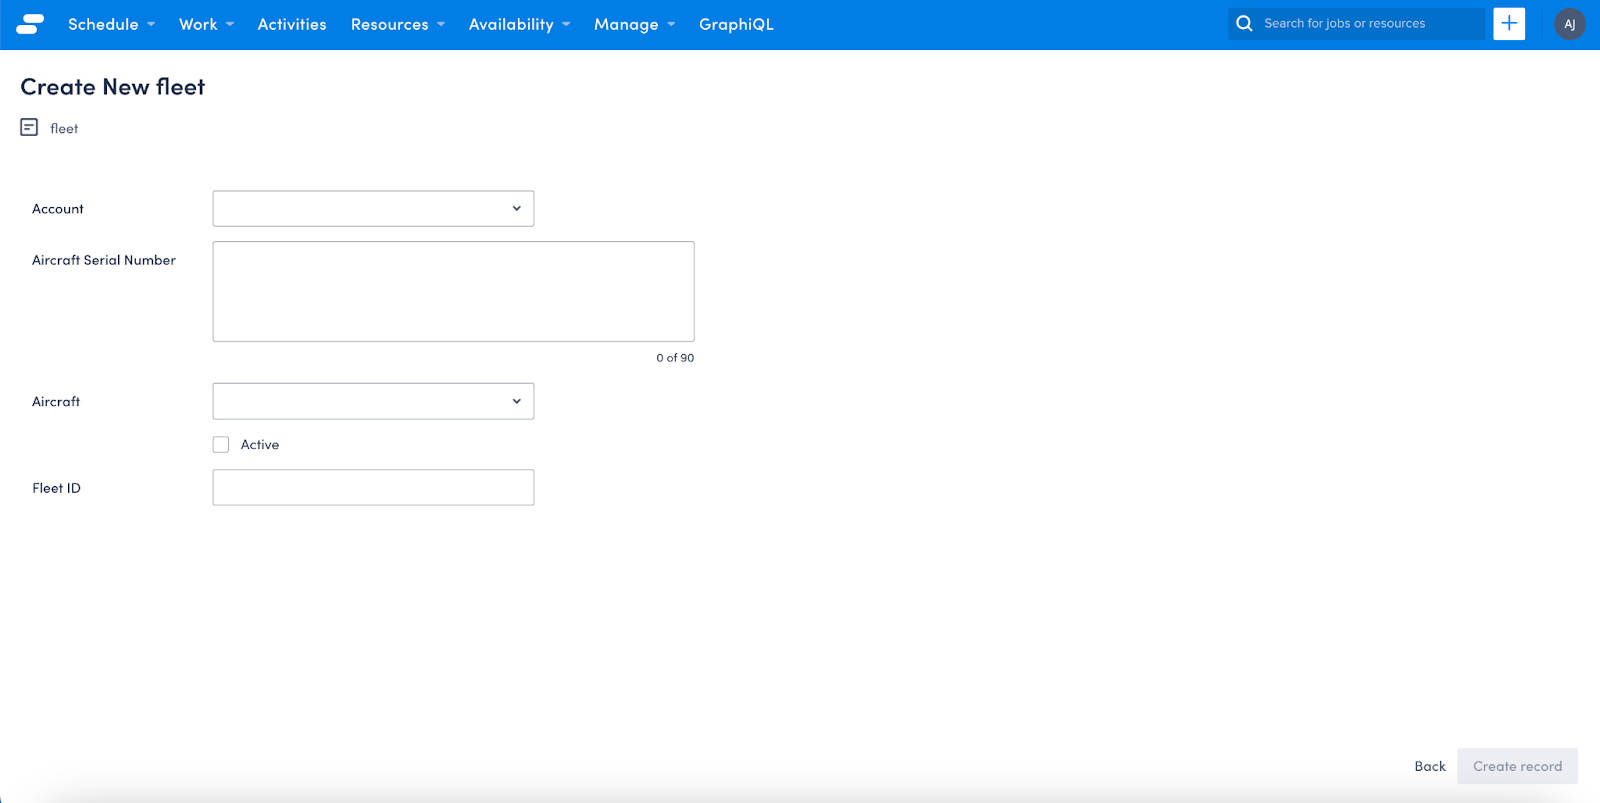
What if we had a way to populate the Aircraft field with the information needed without having to search for it? Well dear reader, Skedulo gives you that option! We simply need to add a few tweaks to our page for the Aircraft View and we can make data entry just that little bit more special (pew pew).
There are two key parts to pre-populating the data. The first is to tell the page that you’re passing the data to (i.e. the Fleet Create page shown above) what data will be going where. The second is to update your Add button to include the parameter of the value you want to send over. The example below looks at populating the Aircraft value when adding a new Fleet Assignment, however there is nothing stopping you from pre-populating other fields (you may want to automatically set the IsActive field to True, or populate the date on a new record). You simply follow the steps to let the target page know what to expect, and update the button or link to pass through the parameter.
Let’s dive in! First of all we want to tell the target page what we are expecting to be populated. To do this, we want to update the Fleet Create page. Underneath {% set validation_schema=”fleetCreate” %} we want to add the following code snippet:
    {% extends "base-recordcreate" %}
    {% set resource_name="fleet" %}
    {% set validation_schema="fleetCreate" %}
    {% set default_value %} {"AircraftId" : "{{_.queryParams.Aircraft}}"} {% endset %}
Let’s break down the new snippet, shall we? First up we’re setting a default value. Excellent. That’s pretty straight forward. After that you’re telling the create page of the Fleet object that someone is going to pass through the Aircraft ID to the page, using a query parameter of Aircraft (this means that when you’re updating the button code later, you can simply use Aircraft rather than Aircraft ID).
One handy reminder to point out here is that whenever you create a lookup relationship between two objects, Skedulo will always append Id to the end of your field (even though it doesn’t display on the screen). If you had called your field Aircraft Id, Skedulo would automatically update the field to AircraftIdId. If you called your field Aircraft (as I did), the field will be AircraftId when you’re using it in this scenario.
If you want to add more than one parameter, you simply update the code snippet to be similar to the below, with each parameter separated by a comma.
{% set default_value %} {"AircraftId" : "{{_.queryParams.Aircraft}}", "IsActive" : "{{_.queryParams.Active}}"} {% endset %}
So now your Create page knows you want to send data to it. Huzzah! On to updating the page that will send the data across! Open up your Aircraft View page, and scroll down to where you have your list for Fleet Assignments. The button code should look like this
    <platform-component
      package-name="recordpage"
      name="RecordTemplate"
      template="{{ '<a href="/platform/page/fleet-create">
                    <sp-button button-type="secondary">
                      Add Fleet Assignment
                    </sp-button>' }}">
    </platform-component>\
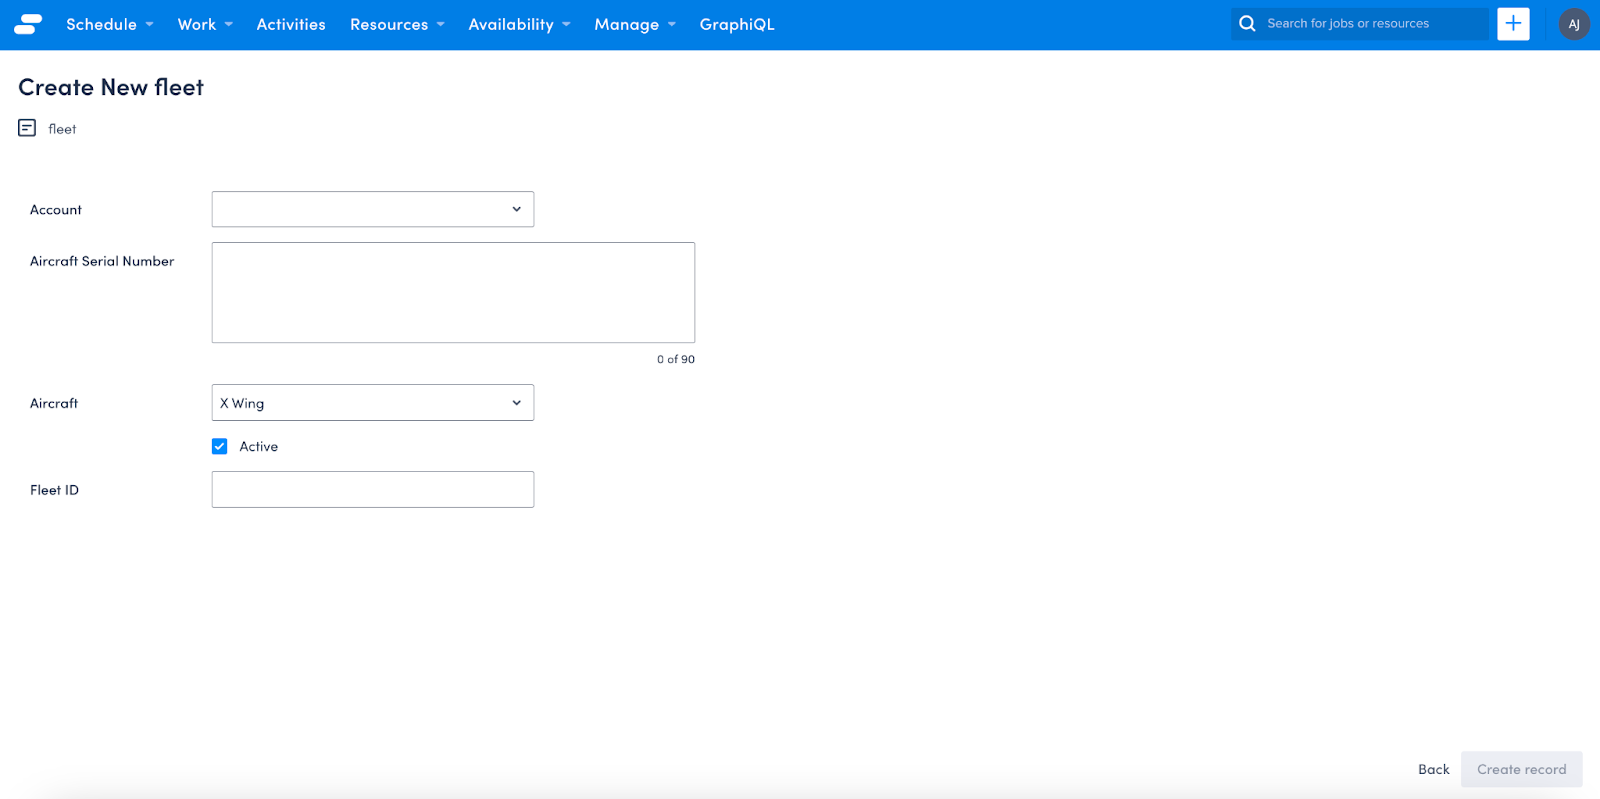
Within the button code we want to add the two fields we told the Fleet Create page we want to populate. The Aircraft field will be populated with the UID of the Aircraft record your users are looking at when adding the assignment, and the Is Active field will be set to True. Using the below code snippet we can populate both these fields.
    <platform-component
      package-name="recordpage"
      name="RecordTemplate"
      template="{{ '
                    <sp-link href="{{_.host.buildPlatformUrl("fleet-create?Active=True&Aircraft="+ _.queryParams.uid)}}">
                    <sp-button
                      button-type="secondary">
                      Add Fleet Assignment
                    </sp-button>' }}">
      </platform-component>
One thing to note in the above snippet is that we have swapped the base URL from <a href=”/platform/page/ to href=”{{_.host.buildPlatformUrl( and added the _.queryParams.uid to the end of the URL construct. This will safeguard against any changes in the base URL in the future, and is considered best practice.
Updating the Aircraft Parts button is more of the same — update the Aircraft Parts Create page with the parameters to expect, and then update the Aircraft View page to send the parameters through the button!
    <platform-component
      package-name="recordpage"
      name="RecordTemplate"
      template="{{
                  '<sp-link href="{{_.host.buildPlatformUrl("aircraft-parts-create?Aircraft="+ _.queryParams.uid)}}">
                  <sp-button
                    button-type="secondary">
                    Add Part
                  </sp-button>' }}">
      </platform-component>
Now, when your users are accessing the Aircraft page, they can look at the details of the aircraft, the parts needed to service the aircraft, which customers have the aircraft in their fleet (either actively or as a retired vehicle) and add new parts or fleet assignments with less clicking, now that you have incredibly helpfully pre-populated the data for them! You are an absolute rock star of a freedom fighter!
Join us here at Low Code Corner next time for our final episode when we discover how to add redirects to your create and edit pages, removing extra clicks once again! And as always, if you have questions, reach out to us via the comments below or on Twitter @SkeduloDevs.