GraphQL 101: Part 1 — Accessing Data on the Pulse Platform

Welcome to the first part in this series on using GraphQL with the Skedulo Pulse Platform!
I have touched on GraphQL in an earlier post, so if you’ve not already read it, you can check it out here. This includes a bit about what GraphQL is, and how to use inbuilt tools to explore, so I’d recommend reading it first!
Today, we are going to cover basic data access, simple filtering, and pagination. I’ll be providing example queries which you can use in an API client like Insomnia, in a Web Extension, or within Skedulo by using GraphiQL
First things first, a quick introduction. GraphQL is a query language for APIs. We use it on the Skedulo Pulse Platform for both retrieving and changing data. It is very powerful and allows us to retrieve or change only the data we need within a call, rather than getting too much, or having to make multiple calls as is common with RESTful APIs.
GraphQL calls are made in the form of queries. These tell the Pulse Platform exactly what information you’re requesting. This means, for example, that you can ask for only the specific fields you need, or you can get information from related records within a single call.
Like query languages you may be used to (e.g SQL), you can filter and paginate within a GraphQL query and, of course, the criteria within these filters can be dynamic. We will go into more depth on filtering in a future post in this series.
With that out of the way, let’s begin with a simple use case to help explain how GraphQL works: Getting all of the region records within a tenant
We will use Insomnia (an API client) in these examples. However, the process will be very similar for other clients like Postman or cURL.
The first thing we need in order to make calls is an API token. If you don’t already have a token handy, check out the developer docs here to see how to generate one.
Please note that if you’re doing this from within a Web Extension, you don’t need to generate a token because it will be injected automatically. For more on Web Extensions, check the Skedulo Developer Documentation here.
Unfiltered queries
So, token in hand, let’s make our first GraphQL call.
The endpoint we need to use is https://api.skedulo.com/graphql/graphql, and we want to do a POST request with the request type of ‘GraphQL’.
We also need to make sure we set the authentication to ‘Bearer Token’, the prefix to ‘Bearer’, and the token to our API token.
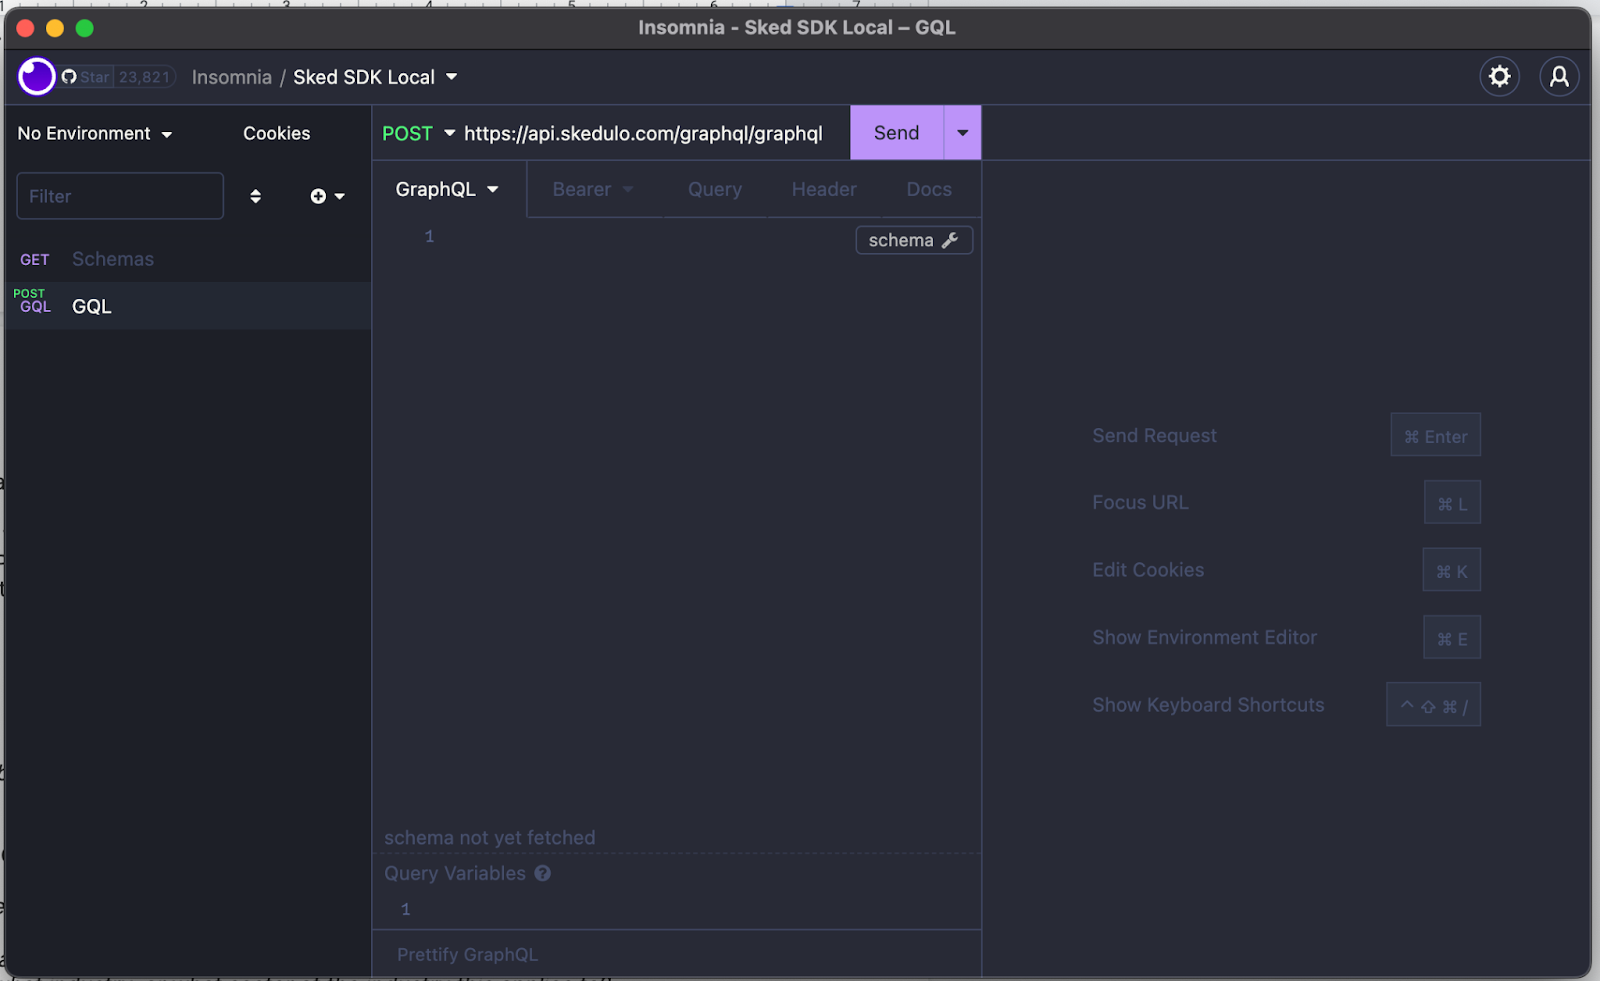
Insomnia will automatically add the correct headers, e.g Content-Type however if these get cleared, please make sure Content-Type is set to application/json

Now we’re ready to make our first call! For this example, copy and paste the following into Insomnia:
    query {
      regions {
        edges {
          node {
            UID
            Name
          }
        }
      }
    }
Hit send, and you should be returned the regions within your Skedulo tenant, for example:
    {
      "data": {
        "regions": {
          "edges": [{
            "node": {
              "UID": "0003ef0d-2e08-4e37-8b91-c35ccc36ad84",
              "Name": "South West England"
            }
          }]
        }
      }
    }
So, as we can see in this response, it’s returned all of the regions in this tenant (one, in this case) in the ‘edges’ array. You can also see that it has only returned the fields specifically requested in the query.
Pagination
If you are performing unfiltered queries, it’s likely they could return a large amount of data. The Skedulo Pulse Platform limits queries to return 200 results at once. This is to ensure stability of the platform.
So, in order to get more records, we need to paginate through the results. This is very simple in GraphQL.
We simply need to include a few more fields within our query in order to know if there are more pages, and how many there are.
We will cover more advanced use of pagination in our future post on filtering, but for now let’s talk about basic pagination
The below query is similar to our first, but now includes a “cursor” field on our queries object, as well as a “pageInfo” object.
    query {
      jobs {
          edges {
            cursor
            node {
              UID
              Name
            }
          }
          pageInfo {
            hasNextPage
            hasPreviousPage
          }
        }
    }
The cursor is how we ask for additional records, and the pageInfo is how we know if there are more pages.
A response to this query may look like:
    {
      "data": {
        "jobs": {
          "edges": [
            #more records
            {
              "cursor": "MQ==",
              "node": {
                "UID": "00142b03-37c0-435c-9ce0-a35bd80fc8d6",
                "Name": "JOB-0001"
              }
            }
          ],
          "pageInfo": {
            "hasNextPage": true,
            "hasPreviousPage": false
          }
        }
      }
    }
Take note of the cursor field. We will use that with the next query to get more records. This is achieved by specifying the after property, like in the below example:
    query {
      jobs(after: "MQ==") {
        edges {
          cursor
          node {
            UID
            Name
          }
        }
        pageInfo {
          hasNextPage
        }
      }
    }
Running this query, we then get the next 200 records after the one corresponding to the given cursor. Next, simply repeat until hasNextPage becomes false to get all the records.
We will cover this in more detail when we talk about advance filtering, but if you can’t wait, you can check out the developer docs here.
Field Discovery
Now that we’ve done our first GraphQL query, you’re probably wondering if there’s an easy way to find out which fields you can query from a specific object. Of course, you can look at the object definition within the Skedulo setup menu, but there is an easier way!
GraphQL supports what are called ‘introspection’ queries. These allow you to ask the API about what it can return and what it supports. We will cover this in depth in a future post (and it’s also touched on in my previous GraphQL post), but for now its worth understanding that Insomnia will automatically perform introspection queries for you, allowing auto-complete when you’re constructing your GraphQL queries.

You can also click the “schema” button on the right of the window to browse the schema yourself (much like you can in GraphiQL).
Single record queries
So, this is great if we need to get all records, but what about when we need an individual record? Say, for example, we have a Job ID already and we need to get more information about just that job.
Well, we can perform a different query! Rather than a jobs query (or regions, like in our above example), we can do a jobsById query, which as you’d expect, returns the chosen fields for a single job when provided with its ID.
Here is an example of a jobsById query:
    {
      jobsById(UID: "00141fb5-5a30-484e-bf83-4fa2c81094da") {
        UID,
        Name,
        Start,
        Duration
      }
    }
Of course, if you wish to run this in your own tenant, replace the UID with one that corresponds to a job in your tenant.
The result is slightly different to the first one, with the returned record being in the jobsById property of the returned JSON structure.
    {
      "data": {
        "jobsById": {
          "UID": "00141fb5-5a30-484e-bf83-4fa2c81094da",
          "Name": "JOB-0067",
          "Start": null,
          "Duration": 50
        }
      }
    }
So, this naturally leads us on to some basic filtering because getting ALL records from an object likely isn’t useful most of the time, and getting a single record is only handy when you already have its UID.
Simple query filtering
As mentioned above, GraphQL supports filtering and we’ll go into more detail in a future post, but for now let’s try some basic filtering.
Sticking with jobs, here is an example of how we’d get only jobs with the status of “Queued”
    query {
      jobs(filter: "JobStatus == 'Queued'") {
        edges {
          node {
            UID,
            Name,
            Description,
            JobStatus
          }
        }
      }
    }
You can see that this query looks almost identical to our first one, except this time we are specifying a filter and some criteria.
As you’d expect, the resulting JSON structure is the same as the unfiltered query, but now with only the records that match the criteria:
    {
      "data": {
        "jobs": {
          "edges": [
            {
              "node": {
                "UID": "001483a7-fe78-4cce-b77e-76d84464b8e1",
                "Name": "JOB-0035",
                "Description": "updated from GraphiQL3",
                "JobStatus": "Queued"
             }
            },
            #...more records
          ]
        }
      }
    }
There are, of course, more operations you can do within a filter aside from a simple ‘equals’. If you want a sneak peek of that check out the Skedulo Developer documentation here, otherwise stay tuned for the post on advanced filtering!
Now that we know about getting all records, getting records by UID and simple filtering, the last thing we will cover in this post is getting related records in a single call.
Related Records
Taking our previous filtered example, let’s include information about the allocated resource in our query, but in this case, we will change our filter to “Pending Dispatch” because “Queued” records likely won’t yet have a resource allocated.
    query {
      jobs(filter: "JobStatus == 'Pending Dispatch'") {
        edges {
          node {
            UID,
            Name,
            Description,
            JobStatus,
            JobAllocations {
              Status
              Resource {
                Name
              }
            }
          }
        }
      }
    }
Again, this query looks similar to the previous one, but note that we’re including the JobAllocations field. This is a relationship to the Job Allocations object, and we can then include fields from that object (e.g “Status”) and even include fields from objects related to the Job Allocations object (e.g “Name” on the Resource object).
Here is what the response from this call looks like:
    {
      "data": {
        "jobs": {
          "edges": [
            {
              "node": {
                "UID": "00142b03-37c0-435c-9ce0-a35bd80fc8d6",
                "Name": "JOB-0001",
                "Description": "updated from GraphiQL1",
                "JobStatus": "Pending Dispatch",
                "JobAllocations": [
                  {
                    "Resource": {
                      "Name": "Michael Wheeler"
                    },
                    "Status": "Pending Dispatch"
                  }
                ]
              }
            }
          ]
        }
      }
    }
You can see it includes all of the requested fields in a similar format to how they are laid out in the query. This makes it very easy to get just the information you need without having to ask for unnecessary data, or make multiple requests and join them together.
Conclusion
That is it for the basics of accessing data on the Skedulo Pulse Platform. As you can see, GraphQL is an incredibly powerful way to query data, offering several advantages over the traditional RESTful APIs.
In future posts we will be covering creating/updating records (mutation), advanced filtering, batch data processing, and introspection. This will give you all the tools you need to build rich experiences both on the Skedulo Pulse Platform as well as integrate with other systems!
As always, we’d love to hear about what you’re building on the Skedulo Pulse Platform so please reach out to us on Twitter @SkeduloDevs or LinkedIn!