Mastering low code app development — Going Rogue: Creating Date Time Fields via the Skedulo Lens API

Hello again, fearless low coders! Today, we are heading into the world of using APIs. Obviously, I am not a developer. A true developer would find this incredibly basic (and to be fair it is) but as a declarative maven of old I initially found this quite daunting. But, dear reader, I persevered and did it — I created a Date Time field using the API!
There are a few steps we need to follow to make this work, so click along with me and let’s go rogue…
Step 1 — Skedulo Tenant Ready to launch
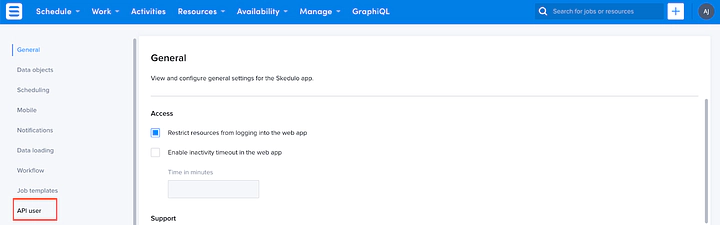
First of all, you want to make sure you’ve set your API user in your Skedulo tenant. Go to your Settings section, and click on the API user menu option.
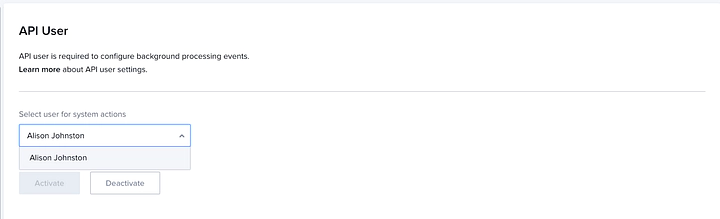
From here, select the user you want to nominate as the API user and activate.
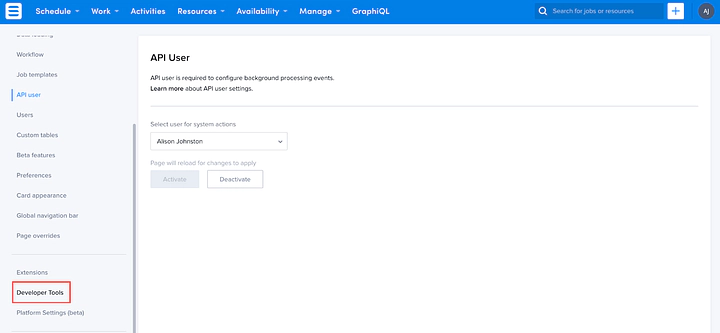
After that, you want to create your API token (sounds scarier than it is, trust me). Make sure you copy this token and keep it somewhere safe (like 1Password, LastPass, NOT a post it note on the side of your monitor, please). Scroll down to the Developer Tools menu option.
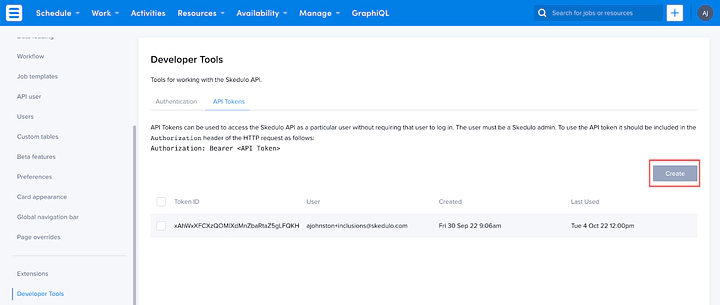
Click on the API Tokens tab and then Create.
Step 2 — Ready your weapon of choice
Next, we have to write the API call. For this, you’ll need a third party tool such as Postman, Insomnia or Apigee. I asked around and found that Insomnia was a good choice for a beginner like me. Insomnia is pretty self explanatory and while it took me a few tries to understand, I got there — and so will you! Feel free to use any tool that works for you — some of your coworkers may have strong feelings about which tool to use. It’s a personal choice.
In our Skedulo Developer Documentation, there’s a whole section on authentication. From here, I figured out that I needed to know which region my Skedulo tenant was in because this allows us to then call the right version of the API.
So, how do we find this helpful information? The documentation tells us! Huzzah!
https://api.skedulo.com/auth/config/team/web?name=my-team, where my-team is the team name in any region.
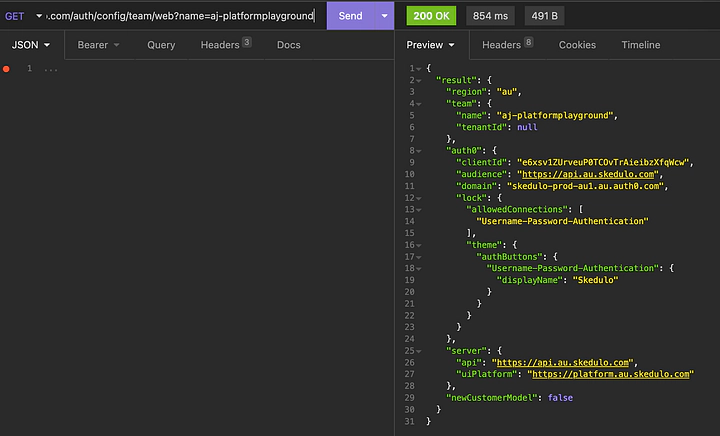
For my Skedulo tenant (where my team name is aj-platformplayground), I used a GET command and entered the following:
https://api.skedulo.com/auth/config/team/web?name=aj-platformplayground
What I got back tells me that I need to be using the AU APIs (see towards the bottom where the server tells me my API is api.au.skedulo.com).
So, after this I need to tell Skedulo via the API that I’m allowed to do stuff over the API. This is where our authentication and API token come back to us.
Skedulo allows authentication using a Bearer Token (thanks documentation!). This is actually the API token we created back in Step 1. Being a big fan of copy & paste, I looked at the Lens API Overview and saw I needed all my API calls to have the following info in the HTTPS header:
content-type:application/jsonauthorization:Bearer “$API_TOKEN”
So, back to Insomnia and there is a whole section for the Headers. All the values were blank. So let’s dive in and fix it!
First off, I added the content-type and set the value as application/json. Then, I added the authorization header and set the value to Bearer “API token value”.
Handy hint for beginners
I initially pasted my API token inside the inverted commas. This didn’t work so I went hunting for the reason. When I clicked on the Headers tab there was more info:
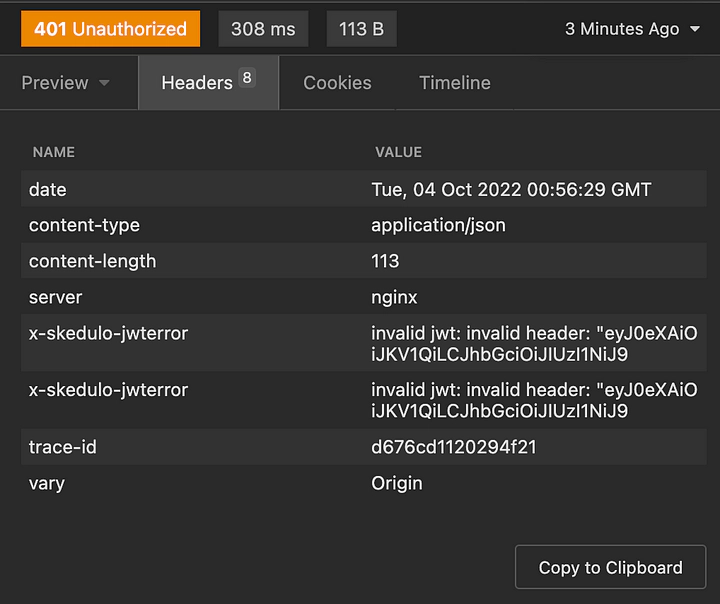
Looking at the error I knew instantly what was wrong. The inverted commas! Consider this a friendly reminder that inverted commas should be removed before posting your API call.
Once I removed the inverted commas from my Authorization value of my header, I clicked Send and hey presto!! I can’t remember the last time I was so happy to see a little green box telling me everything was ok!

Step 3: Fire in the hole!
OK, my Insomnia was now ready to write a new custom field to my aircraft object! All I needed was the right API and the right format of the JSON message to get this done. Enter our trusty developer documentation guide for custom fields!
First off was the API that we want to send our data to (making sure to grab the right region of the API):
https://api.au.skedulo.com/custom/standalone/fields
This API allows you to set new fields on an existing object when you use the `POST method. Sounds like what we want! Next, we move onto the JSON message. Good old copy & paste to the rescue, and we get:
{
"name": "LastHyperdriveUse",
"schemaName": "aircraft",
"label": "Last Hyperdrive Use",
"description": "Date and time of the last time hyperdrive was used",
"fieldType": "datetime",
"column": {
  "type": "datetime",
  "required": "false"
	}
}
Let’s break it all down, shall we? JSON messages have a line for each Name/Value pairing being sent to the API. This means that each line in the above code snippet has the name (i.e. “label”) and a value (i.e. “Last Hyperdrive Use”) which we want the API to create as a custom field. So, you use the JSON to tell the API that you want the name of the field to be LastHyperdriveUse, and the schemaName (i.e. the object) is aircraft. Pretty neat, huh?
| Name | Description | Sample Value |
|---|---|---|
| API name | This will be the API name of the field - no spaces or special characters please. | LastHyperdriveUse |
| schemaName | This is the name of the data object you want the new field to appear on. Make sure you use the Object’s Name, not the Label. | aircraft |
| label | This is what will display on screen - usually it is the same as the name, but rendered with spaces. | Last Hyperdrive Use |
| description | This is a further description as to what this field is used for. | Date and time of the last time hyperdrive was used |
| fieldType | This is the type of field you’re creating. For date & time fields, this needs to be entered as datetime (i.e. no capitals, underscores, spaces etc etc). | datetime |
| column | This is further information around the field you are creating. This can include if the field is to be required, if a default value is to be populated, or if this field must be set as unique across all records. | “column”: { “type”: “datetime”, “required”: “false” } |
Check your spelling, and click on that trusty Send button. Wait for your new favourite green box to let you know your rogue mission is OK and then use your Hyperdrive to get back to declarative nirvana! You did it! You sent an API call! You. Are. A. Legend.
As always, if you have questions, reach out to us via the comments below or on Twitter @SkeduloDevs